
If you got one Reolink camera (or several) and a TerraMaster NAS as your home server, I am fairly sure that your first thought was whether you can use these two devices without needing to go the NVR route. And the answer is yes, you can, but it’s not going to be as simple as with other NAS brands (such as Synology or QNAP). Nevertheless, it’s very much doable and I know that some people (even professionals..) were taken back by the lack of a dedicated application, but there are other means to push the video to the HDDs (or SSDs), such as FTP.
And the good news is that the TerraMaster NASes can work as FTP servers and the Reolink cameras as reliable FTP clients, but be aware that FTP is everything but secure (the packet sniffing risks are real and very dangerous). That being said, if an NVR is out of the question and your TerraMaster NAS is just too good to let go, then follow this guide to get everything properly set up.
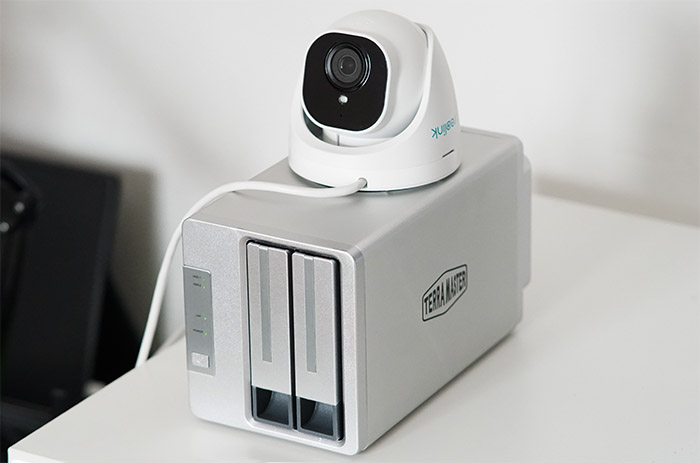
For this application, I have used a TerraMaster F2-210 equipped with a couple of HDDs (a Seagate IronWolf 2TB and a Seagate IronWolf 4TB in RAID 1) and a Reolink RLC-520A camera that has a built-in motion detection sensor (and a lot more, but for the sake of this article, this is more than enough).
Furthermore, I will skip the installation of the software on the TerraMaster NAS (I have written a review of the F2-210 here), as well as the app configuration of the RLC-520A – it’s worth noting that besides the mobile application, you can also use the Reolink Client for Windows or MacOS, but for now, we’re going to use the app.
Note: It is not necessary to insert a microSD card in the Reolink RLC-520A for the FTP method to function.
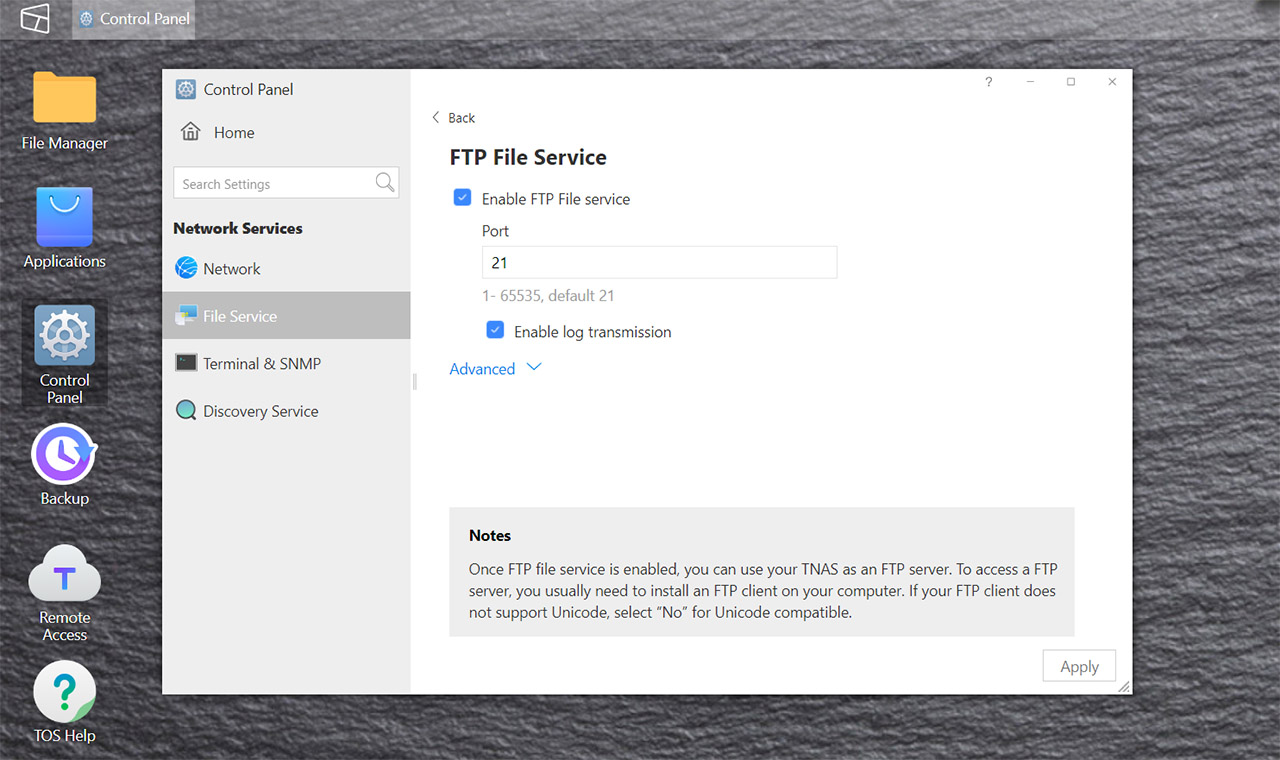
1. Enable the FTP File service on the TerraMaster NAS.
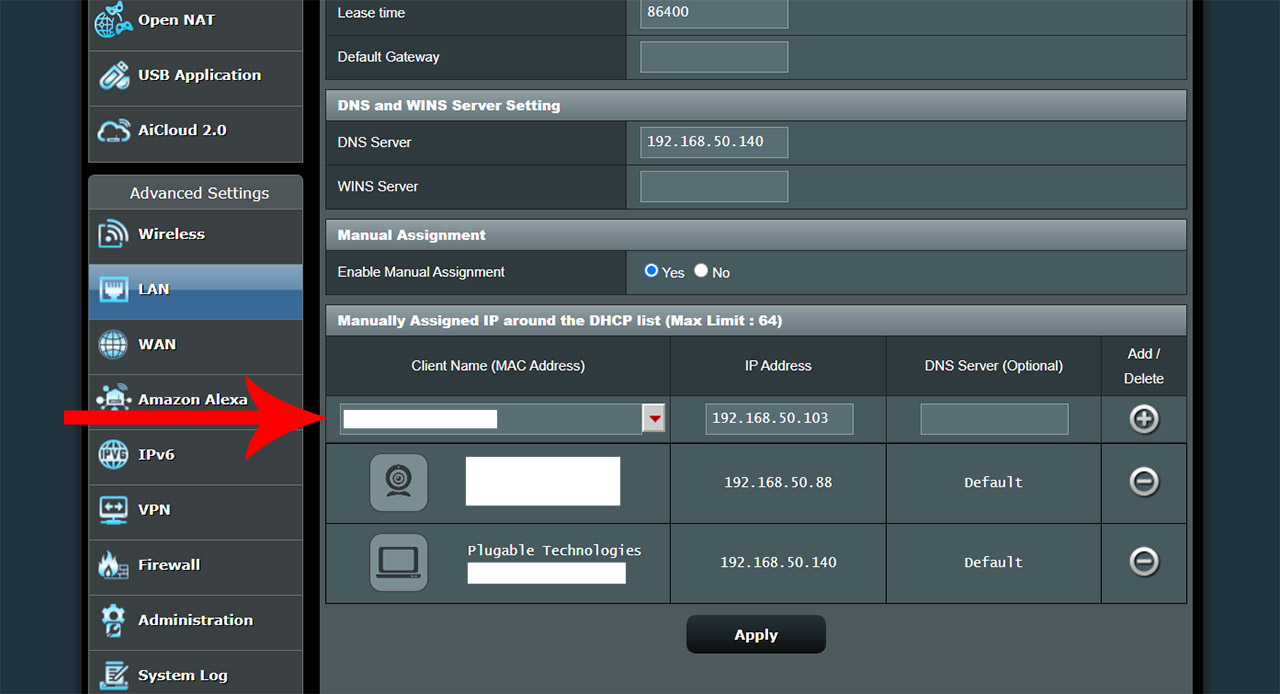
You will need to access the TNAS software by entering the IP address of the NAS in the URL of any browser – you can find it in the list of the clients from the GUI of your router (most routers have the default IP address either 192.168.1.1 or 192.168.0.1). It’s not a bad idea to also reserve a static IP address for the NAS and, in the case of an Asus router, it’s a fairly simple process – open the web-based UI, go to LAN (from under Advanced Settings) and select DHCP Server. At the bottom of the page, there should be the Manually Assigned IP around the DHCP list and here, you can select the Client name and the IP that you want to reserve (the NAS should be called Noon Technology Co Ltd).
After that, insert the necessary credentials to log into the TerraMaster NAS and from the user interface, select Control Panel > File Service > FTP File Service. Click on Enable FTP File service and you can leave the Port at 21 (the default).
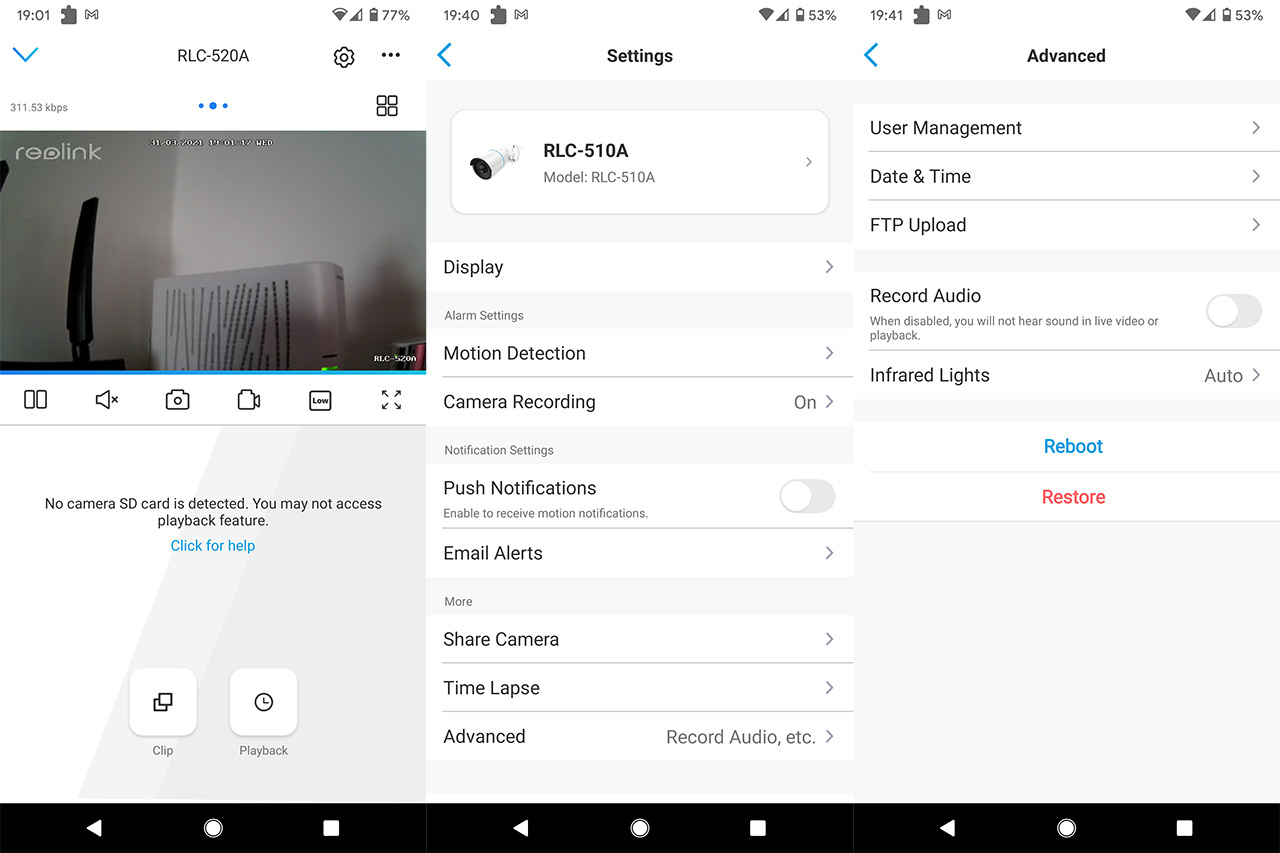
2. Access the FTP section on the Reolink camera.
We’re going to use the mobile application to access the FTP section on the RLC-520A so, enter the Reolink app, select the camera (in case there are more in the list) and enter the Settings section (tap on the cogwheel icon from the top right corner). Next, tap on Advanced and select FTP Upload. Here, make sure that the FTP Upload is enabled and we can move on to the FTP Settings.
3. Configuring the FTP client.
In the FTP Settings window, you will need to enter the following information:
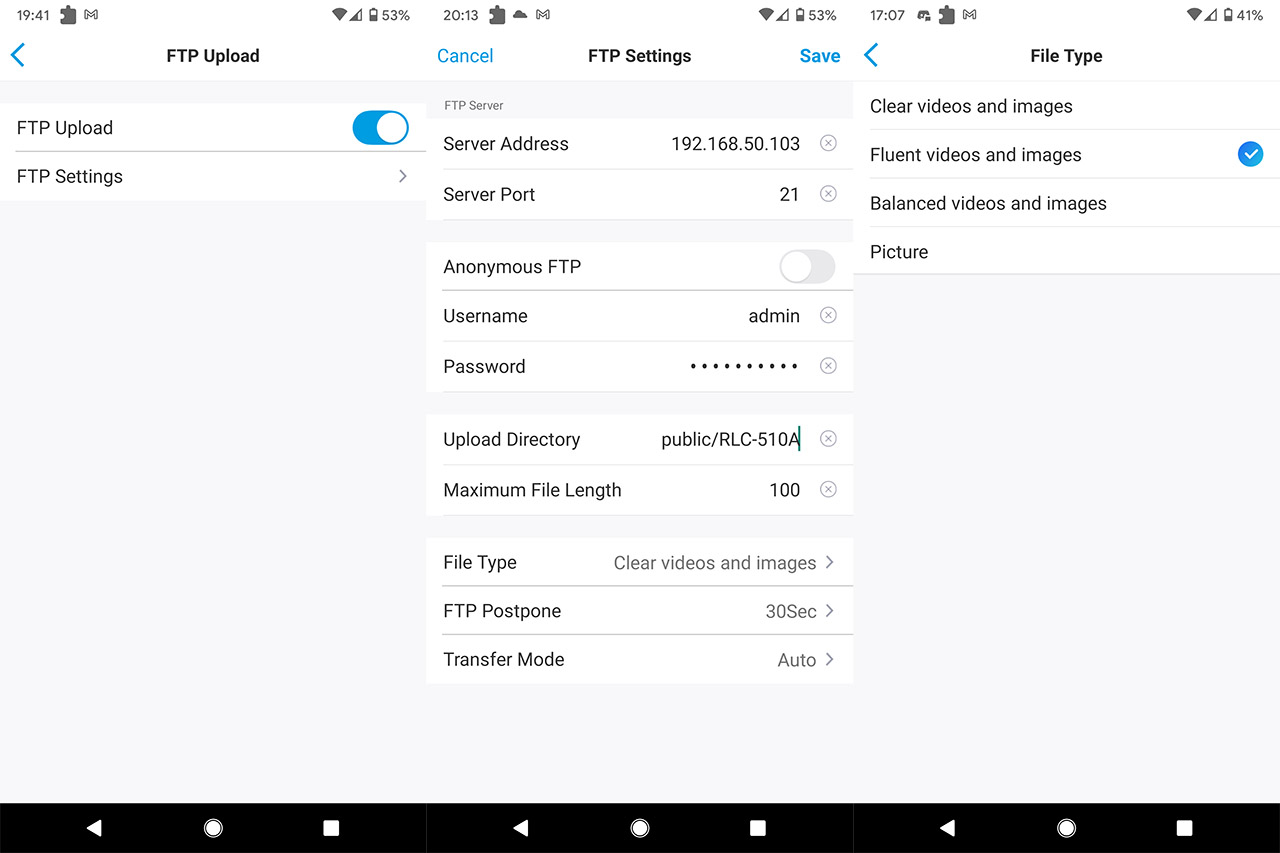
- Server Address: this is the LAN IP address of your NAS and, in my case, it was 192.168.50.103.
- Server Port: the default is 21 – if you changed it in the Terramaster NAS UI, you need to change it here as well, otherwise, leave it as it is.
- Anonymous FTP: if your FTP server doesn’t have any credentials, then enable it, but, since the TerraMaster does require a username and a password, leave this option to disabled.
- Username: the username that you use to log into the TerraMaster NAS, but it may also be a good idea to create a new user for security reasons (in the NAS GUI).
- Password: the password that you use to log into the TerraMaster NAS.
- Upload Directory: here you can simply insert “/” or, if you have created a special folder, you can use that path: for example, I created a folder called RLC-510 in /public and the path was “public/RLC-510”.
- Maximum File Length: by default, it’s 100MB and I think that’s a fair size, so you can leave it like that.
- File Type: here, you need to choose the image quality that you set in the main app window, the one with the live footage (can be Clear, Fluent or Balanced).
- The rest can remain at the default values.
- Click save and it should make the connection with the NAS.
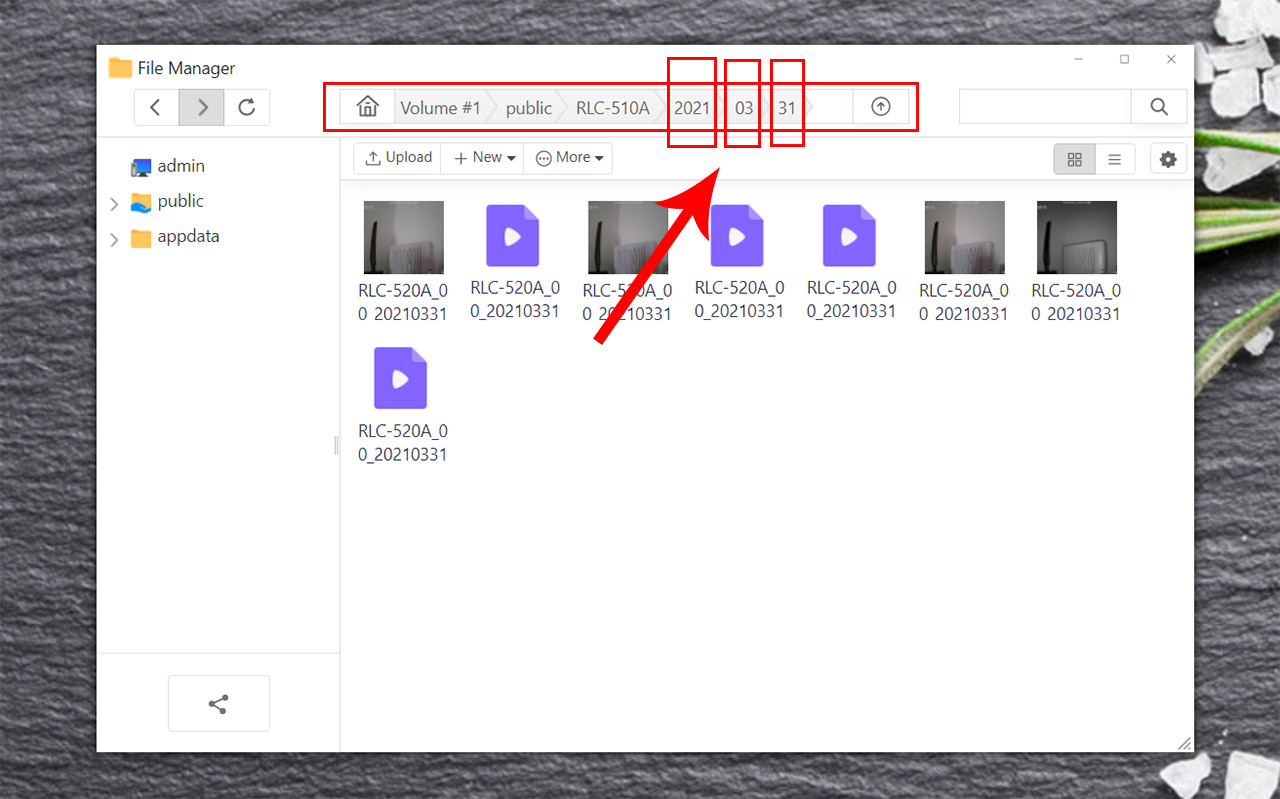
4. Check the TerraMaster Nas for the video files.
Log back into the TNAS and open the File Manager. Depending on the folder that you chose, you should be able to see a few ftp test files (depending on the amount of cameras that you connected to the NAS) and the folder of interest is going to be 2021 (based on the current year). Reolink will create a month and a day folder to help you easily identify the video of interest (as you can see, I also set the camera to save photos when the motion detection gets triggered).
5. Possible issue and how to fix it.
When I was trying to configure the FTP settings in the Reolink camera, I would get an error that the RLC-520A could not connect to the TerraMaster, but, unfortunately, Reolink did not say more than that, so to identify the issue, I decided to connect another camera, the Annke NC400. Doing so and configuring the FTP client in the same manner have finally shown the error: the FTP user did not have writing privileges. I immediately accessed the TerraMaster software and checked whether it was true and it seemed like the admin account did indeed have read/write rights.
Anyway, I disabled those privileges and re-enabled them, saved and restarted the NAS. Afterwards, I was able to connect the Reolink camera to the TerraMaster NAS. This shows that while the TerraMaster NAS hardware is great and very inexpensive, the software still needs to catch up with the maturity level of Synology and even QNAP.
Mark is a graduate in Computer Science, having gathered valuable experience over the years working in IT as a programmer. Mark is also the main tech writer for MBReviews.com, covering not only his passion, the networking devices, but also other cool electronic gadgets that you may find useful for your every day life.