
Reolink is slowly upgrading the sensor on the flagship models from all its series and the latest camera to reach the 4K resolution is the Reolink Argus PT Ultra from the Pan and Tilt Argus line.
| Reolink Argus PT Ultra | |
|---|---|
| Reolink.com | Check Product |
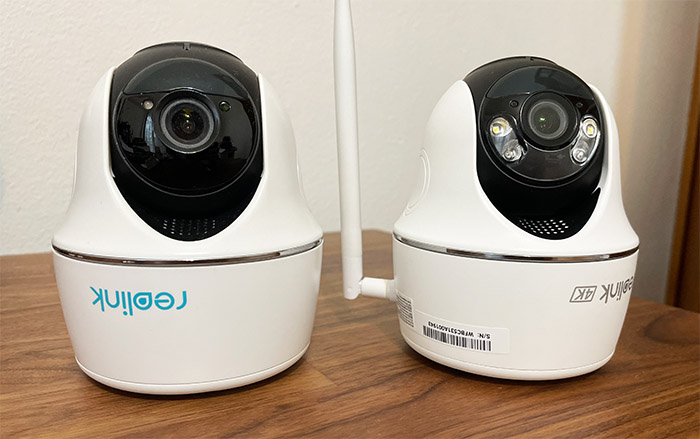
I have tested the PT 2K some time ago and putting it next to the Reolink Argus PT Ultra, there aren’t really that many design differences. Sure, the antenna is bigger (hopefully for a better signal) and there are some spotlights partially surrounding the main lens.
But everything else seems to be the same. The shape is identical, the field of view doesn’t seem to be that much different and we still get a mic + speaker for two-way communication. But there seem to be some improvements on the inside (SoC-related) because the Reolink Argus PT Ultra can detect vehicles, people and pets, while the PT 2K is limited to the first two options. The battery has gotten a slight improvement, going to 6,700mAh but, since the 8-megapixel sensor will eat up a bit more power than the PT 2K, you may have to rely on a solar panel to not recharge it that often.
And the optional solar panel seems to have gotten an upgrade as well, now proudly presenting itself as the version 2 (we will see what’s new in a minute). Considering how other brands have been behaving lately (misbehaving is a better term), it’s worth mentioning that Reolink does not require a subscription for its smart features, it does have a local storage option and it does not require a hub to connect to the Internet. These alone should put it above many other brands, so let’s put the camera to the test and see how it performs.
Design and Build Quality
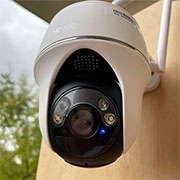
The Reolink Argus PT Ultra follows the design blueprint of its predecessors almost to the letter which means that it sports the same turret-type case that’s made of plastic covered by a white matte finish. And yes, there is a static round base and an upper section that can rotate almost completely, reaching 355 degrees.
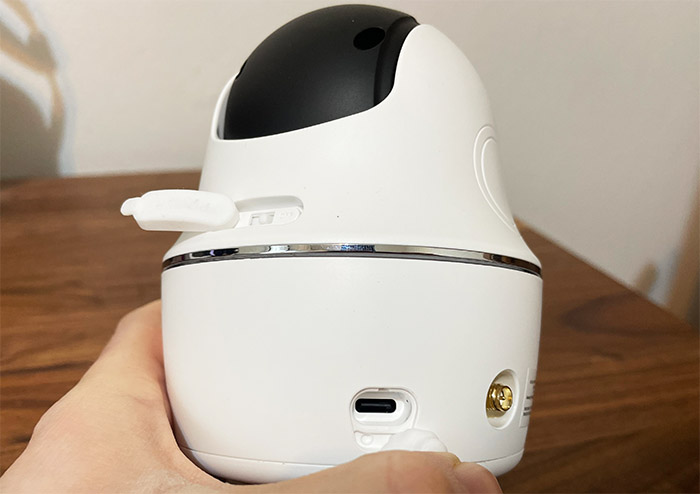
Within this section, Reolink has embedded the lens part which is held by its sides and it can move up and down up to 140 degrees – same as the Argus PT 2K. It’s worth mentioning that this portion is black so it does keep the expected color palette of the security cameras. Returning at the base, we can see a silicone cover which says USB and underneath it, there’s a USB-C port, an upgrade over the microUSB that was present on the Argus PT 2K (for some reason).
And the antenna slot is on the other side – the antenna is removable and almost double the size of the one found on the Argus PT 2K. I saw that the chrome-like dividing section between the base and the upper section is still present on the Reolink Argus Ultra and the On/Off button continues to be protected by a silicone cover. The microphone can be found on the black spherical section, while the speaker sits immediately underneath this area, same as on the PT 2K.
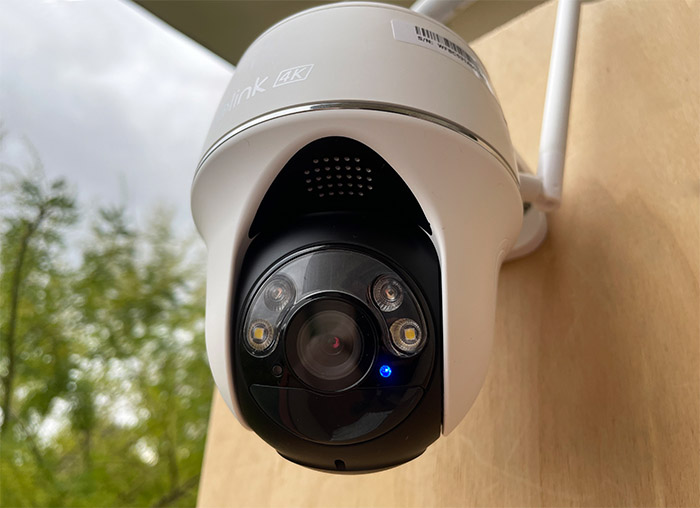
The lens area is where you will see the major changes because we now get a bigger lens module which is surrounded by a couple of IR LEDs and a couple of spotlights, both offering a very different night vision experience. There is more because underneath there is a daylight sensor, a status LED and a PIR sensor to detect movement in the proximity of the camera. There is also a microSD card slot hidden on the lens spherical section and it supports up to 128GB of extra storage.
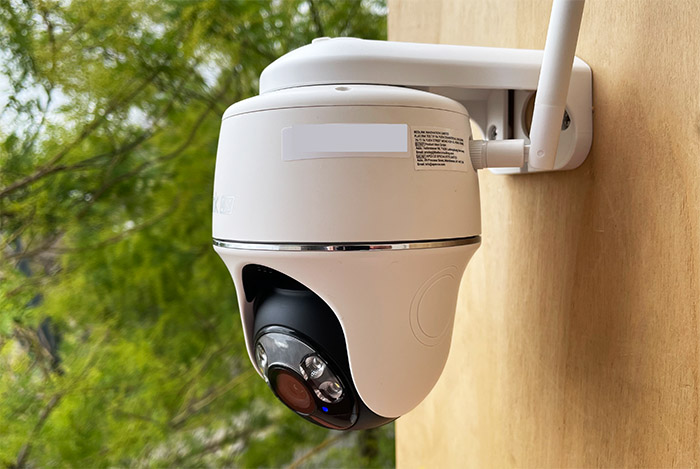
We get the same type of support which puts the camera with the base at the top and there is a tinier circular bracket that can be used to mount the Reolink Argus PT Ultra to a pole or a tree branch. The earlier Reolink camera models weren’t really champions at surviving outdoor conditions, but in the last few years things have improved significantly. And the Reolink Argus PT Ultra is IP64-rated which means that it’s pretty much dust proof and it should survive direct splashes of water. Will it survive a heavy storm?
As long as it’s not completely in the open, it should – be very careful with the connection to the Ethernet cable. I say this because a very heavy storm fried a Reolink RLC-511 when some water slipped between the Ethernet cables. So, use an IP-rated box and the provided waterproof gaskets to ensure that water is kept at bay. What about the temperature fluctuations? The Reolink Argus PT Ultra should survive if the temperature is between 14°F and 131°F (-10°C and +55°C) which means that it will do fine in most parts of the world.
The Internal Hardware
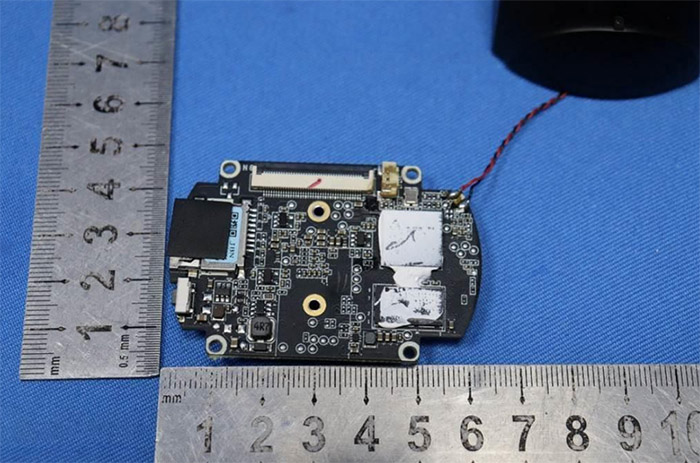
To access the internal components, you need to remove the screws at the bottom and follow pretty much the same steps as you would with the Argus PT 2K. But, since Reolink has provided some photos on the FCC ID website, I thought that maybe I will leave the Reolink Argus PT Ultra intact this time.
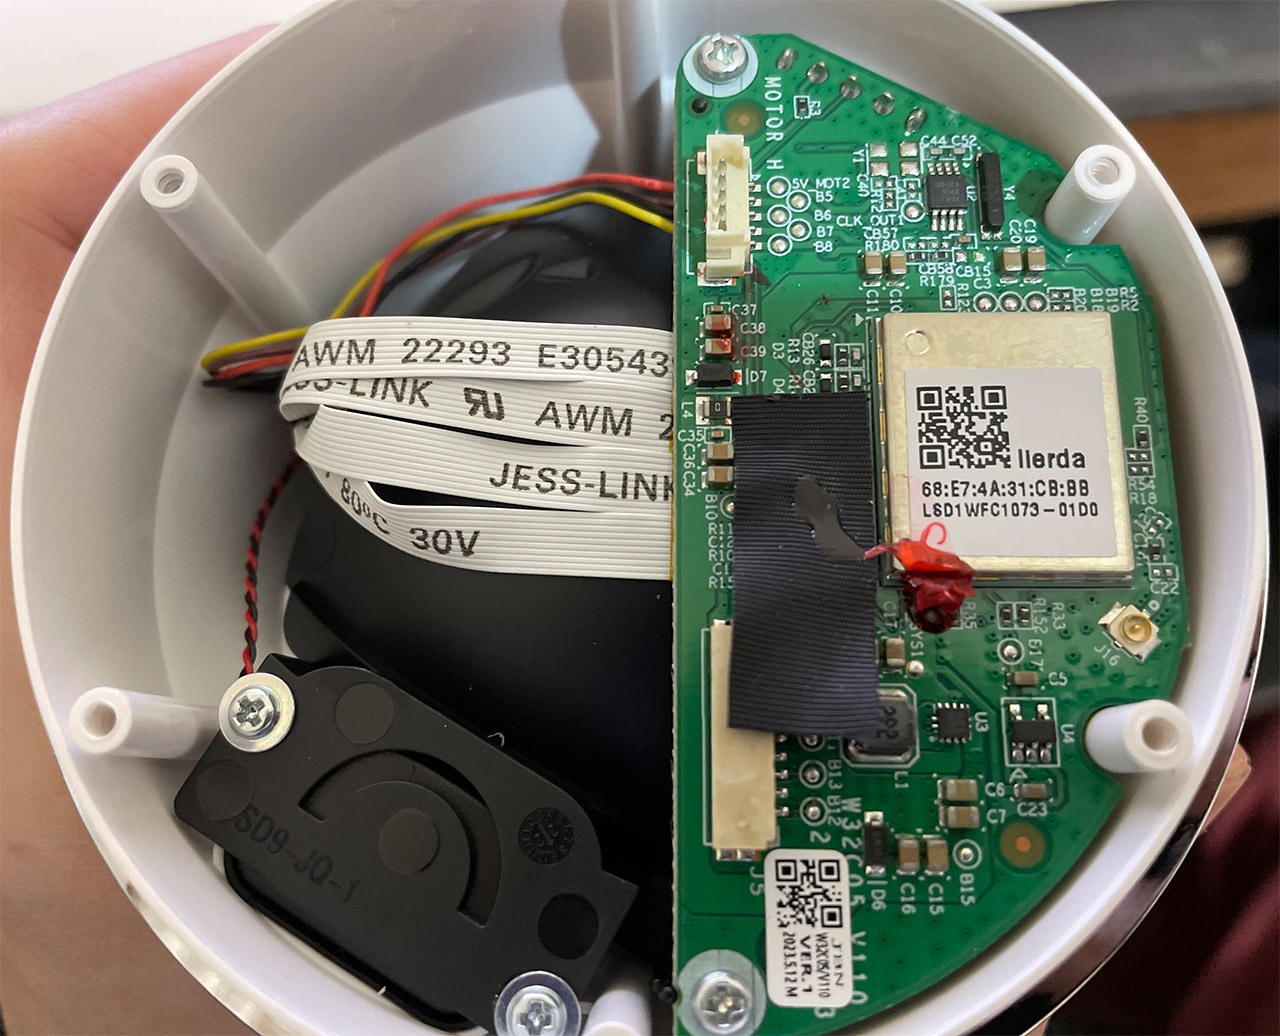
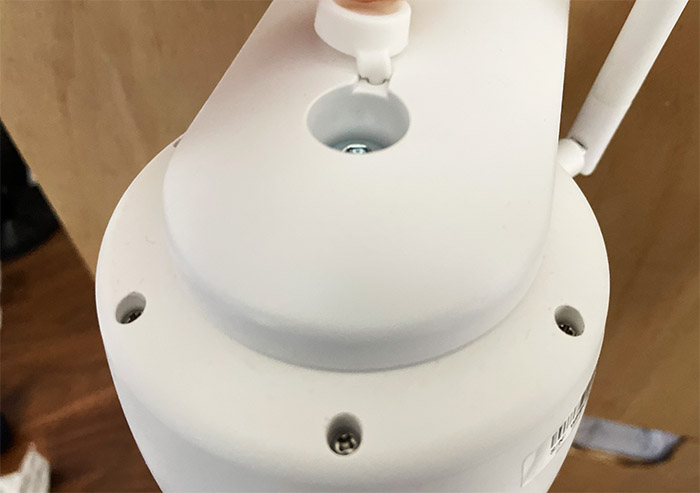
The photos were too unclear to reveal anything, so I took out the screws myself and dug in until I reached the PCB – after taking out the bottom plate, remove the three screws that keep the small circular plastic piece so that the base can be rotated and reveal the extra screws. Take those out and the base should come off. It’s worth noting that there was a single seal surrounding the first set of screws and nothing more (why you should be aware of where you mount the camera).
After I reached the PCB, I could see the WiFi chip and I have no idea what this brand is: Iierda LSDWFC1073. I could also tell that there are two batteries (2x BAK N18650CP), each with the capacity of 3,350mAh. I could not detach the upper side of the sphere, so that second PCB remains a mystery – the FCC ID photos come in handy in this case, kind of.
The Solar Panel 2
Although Reolink took a gamble when it kept the original 3W solar panel with the Argus 3 Pro, it quickly realized that it had to upgrade the panel if it was to remain a useful accessory to higher-res cameras. I think that the move towards the USB-C port also made the solar panel upgrade more natural. Before anything else, remember that the Solar Panel 2 is an optional accessory, so you do need to purchase it separately, but it should be a reliable alternative to having to recharge the inner battery every few days on the Reolink Argus PT Ultra.
The very first thing that you’ll notice after taking the solar panel from the package is how big it actually is. It’s almost double the size of the first gen Reolink Solar Panel and it makes sense considering that the max voltage is 6V and the max power is 5.8W. So, it’s pretty much double the power as well.

The mounting mechanism is the same as before – a pole-type bracket as well as a strap if you need to attach the Reolink Solar Panel 2 to a pole or tree. There is also a waterproof extension that you can use to ensure that water can’t easily enter the USB-C connectors.
The Installation
The hardware installation is as simple as it gets. Mount the bracket to a wall using the provided screws and, since the battery on the camera is most likely going to be empty, it’s wise to first charge it up. You can power up the camera (there is a circular cover near the antenna that hides the switch), but be prepared to quickly install the app otherwise the multi-language instructions will pester you until you do. I have used the Reolink app many times before, so I could just simply tap on the Plus sign from the Home page.
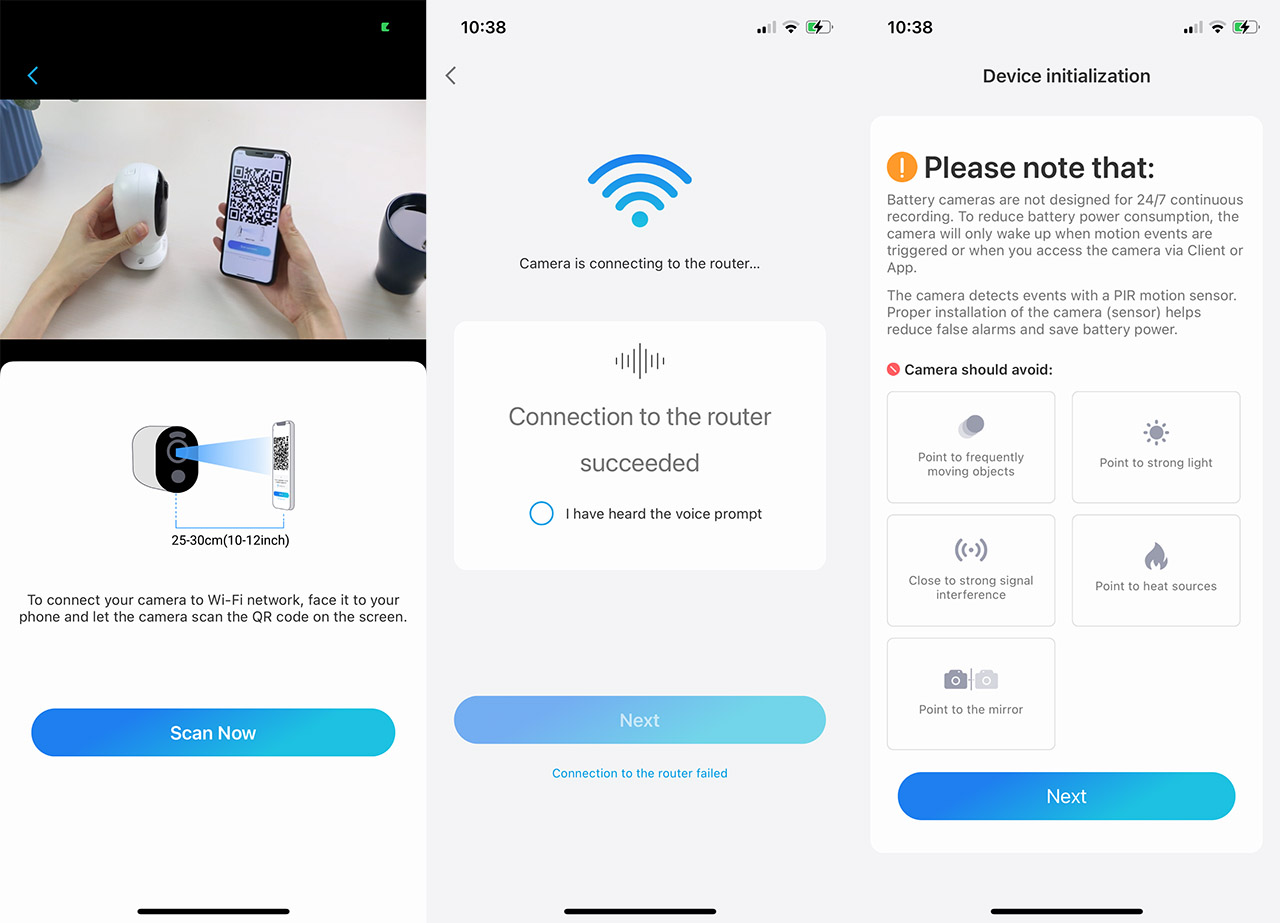
But do know that the mobile app does collect user data, including smartphone info. And perhaps the most important aspect to know is that when you enable the push notifications, the messages do get sent from the manufacturer’s servers. So the notifications are not a local service and their data is collected. If you go the Cloud-route, the videos will be saved on the Reolink servers, which is to be expected. That being said, I did power up the camera and scanned the QR code from the side of the Reolink Argus PT Ultra.
Then, the app asked whether I had the WiFi configured – I did, but it didn’t matter, so I had to give it access to the location once (it’s possible to give the option to type it manually, if the developers care enough) and enter the credentials to the WiFi network (either 2.4GHz or 5GHz – 802.11ac supported). Then, a voice prompt will initiate and the app will ask that I scan the QR code displayed on the screen using the camera. Weirdly enough, the connection to the router failed and I found out later that I forgot to add the antenna – it’s important, otherwise the signal is too weak to reach the wireless router. After that, I had to create a password for the device and could access the app GUI.
At this point, you can rotate the screw from the top of the bracket into the camera and just leave it be – this is also a good time to install the solar panel if you have one available.
The Mobile App
If you’re familiar with the Reolink app from any previous cameras, then know that the layout doesn’t differ that much for the Reolink Argus PT Ultra either. There’s the live footage covering part of the upper half of the screen, while immediately underneath, there’s some quick action icons.
Use them to Pause the live footage, listen to what the mic captures, get a photo, record a video or change the video quality (Fluent, Clear or Balanced). Further down, you can talk with anyone near the camera, zoom on parts of the video (it’s digital zoom), use PTZ or check the Playback section. The PTZ section has changed over the years because it no longer only offers the means to manually move where the camera points at, but you can also set a Monitor Point for a quick return to the user-set default position, there is the Preset Point setting and camera position calibration.
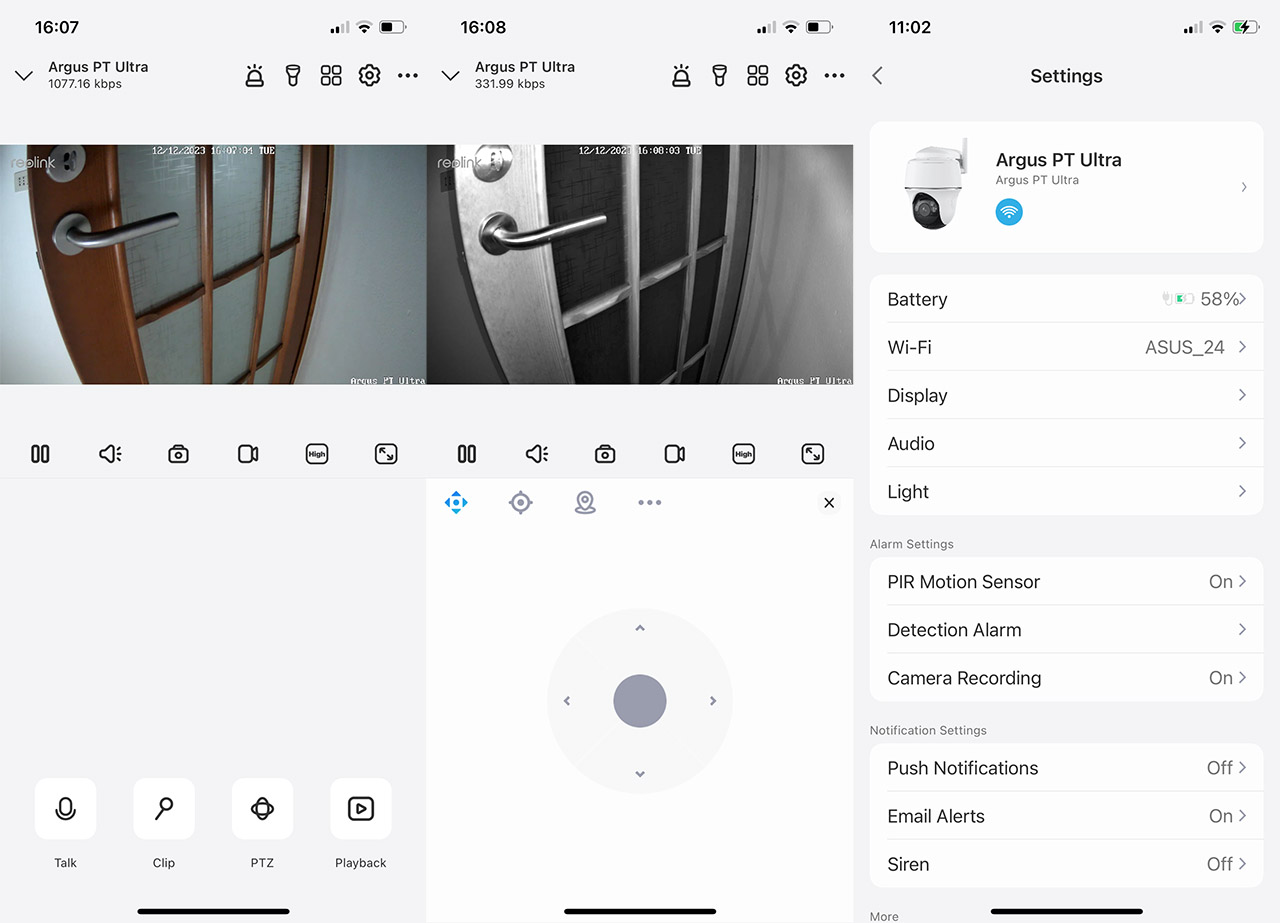
Moving back above the live footage, there are several icons of interest, the first being the Horn (a loud alarm), the Spotlights (turns on or off the LED lights) and most importantly, we gain access to the Settings (the cogwheel). The first set of settings includes the Battery and WiFi info, as well as the option to change the Display and Audio settings, both quite comprehensible. The last one is the Light and here you can adjust how the IR LEDs will behave, as well as when the Spotlights will turn on.
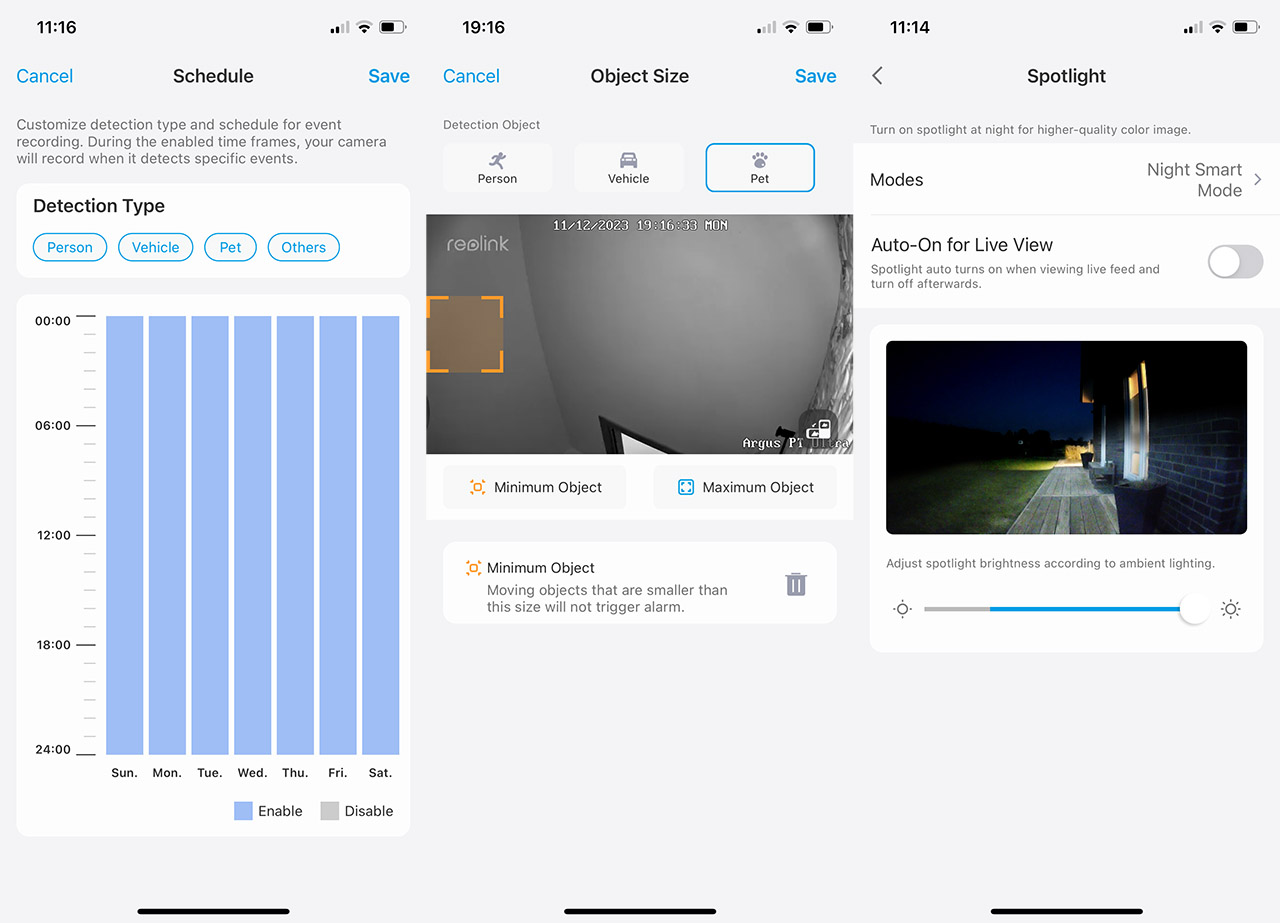
Moving lower, we can see some Alarm Settings which include some motion detection options and the Camera Recording settings, such as the Post-Motion Record Duration and the schedule – choose when the camera motion sensor will be triggered by a Person, vehicle, Pet or Others. Moving lower, we can see that you can enable the Push Notifications, the Email Alerts and the Siren. Lower on the page, I noticed that there’s the TimeLapse option which can be a cool video effect.
The Image Quality of the Reolink Argus PT Ultra
The Reolink Argus PT Ultra is the first 4K camera from the PT series (there is also a fixed position 4K battery powered camera called Argus 3 Ultra) and, when set to Clear, the resolution does rise to 3840 x 2160 pixels. The sensor is 8-megapixel and the max frame rate remains 15fps, just like on the Argus PT 2K. Moving on to the image quality, I first filmed a few videos during the day and yes, it’s rainy, as most winter-time days are here, but we can still get an accurate idea about what to expect from the Reolink Argus PT Ultra.
The video reveals that the camera does a good job at offering lots of details and I could zoom into the image to see that it remains fairly crisp (in the realm of reason, of course). The colors seem to be less contrast-y that on the previous models, but it may also be a lack-of-sun issue since most other Reolink camera I tested during the summer. In any case, the colors are realistic, very little amount of noise when the camera is static and even after the movement, it takes at maximum two seconds to get the lens to focus completely on what’s in front of it.
The car that you see with the blurry number is about 70 feet away and I could see the plate clearly. I could not identify the plate number on any moving car unfortunately, so it either needs to be stationary or moving very slowly. The thing is that if anyone intends to enter your property, they will either stop their car or cruise at a very low speed around your property, enough for you to get the necessary info using the Reolink Argus PT Ultra. What about the movement of the motors?
The transition is fairly smooth as you can see from the video and how fast the camera reacts will depend on how good the WiFi quality is in your home. For example, at the max quality, but quite far from the router (2.GHz), it took 1-2 seconds for the action to apply. If I was closer to the router on the 5GHz network, the reaction time is a bit better. Now let’s have a look at how the camera performs during the night. I have tested the Reolink CX410 very recently and it could produce colored night vision without relying on a bright spotlight. Instead, it used a very large sensor and, if necessary, some warm complementary light. The Reolink Argus PT Ultra does not follow the same principle and instead, it does need to use the bright spotlights to offer colored night vision.
I do think that the CX410 approach is better especially if you live in a highly trafficked area where the spotlight will pretty much stay on for hours, so I am not sure why they didn’t add it to the Reolink Argus PT Ultra since it would have saved a bunch of battery life. Well, maybe in the future versions. Now, for the actual performance, as you can see, the colored night vision is excellent and the image was so detailed that I could see the plate number on the car that was parked about 80 feet away. Despite being during the night, the footage seems like it was taken during a very cloudy afternoon.
Now let’s talk about the IR night vision. It’s a bit less detailed since I could no longer properly see the plate number, but it’s still a very valid video quality. The shadows were a bit dark, but I don’t think they would be able to hide a person and the smart detection worked flawlessly, covering the entire screen.
The Smart Motion Detection
I have seen how Reolink’s smart motion detection has developed over the years from the initial A-series (such as the RLC-520A) and now it has reached the point where it can tell when a pet is in the frame. I do not have any pets, so I couldn’t really put that to the test with the Reolink Argus PT Ultra, but I do have the CX410 pointing at a near wall where cats frequently pass by, but I rarely get them detected.
So, it’s still very close to a beta feature, but it can be better if you set it right. This can be done from the Settings > Detection Alarm and choosing Object Size > set the Minimum and the Maximum size which will trigger the recording. I did notice an interesting extra feature which is in beta stage and it’s called Motion Mark and, if you’re familiar with the ANNKE cameras, then you know that after a moving object is detected, some rectangles will surround the shape. I think that in the future, Reolink may want to implement a motion tracking based on this feature, but it’s just my speculation.
As for vehicle and person detection, things went smoothly, the Reolink Argus PT Ultra being able ‘to see’ cars from very far away (at least 500 feet) and I was also surprise that the camera detected cars from underneath the tree branches. As for people, it depends on the set Sensitivity because at about 200 feet away, there was a person in the frame that the algorithms did not detect. Anything a bit closer, let’s say at about 100 feet and the notifications would arrive. This is both during the day and during the night.
The Conclusion
If you liked the Argus PT, then you’re going to love the Reolink Argus PT Ultra. It has the same design, a very similar view angle and pretty much the same software experience. But it does offer more details during the day and during the night, and we do get colored night vision, even if it does rely on spotlights, which is why it’s better to keep it out of highly trafficked areas to preserve the battery life. Then again, the hefty Solar Panel 2 should be enough to keep it alive as long as there’s a sunny day.
Reolink Argus PT Ultra
Pros
- Good image quality
- The spotlights work well for the colored night vision
- Two-way communication
- USB-C port for charging
- Support for dual-band WiFi (802.11ac)
Cons
- The push notifications happen from the Reolink servers.
- Only IP64-rated.
Mark is a graduate in Computer Science, having gathered valuable experience over the years working in IT as a programmer. Mark is also the main tech writer for MBReviews.com, covering not only his passion, the networking devices, but also other cool electronic gadgets that you may find useful for your every day life.