
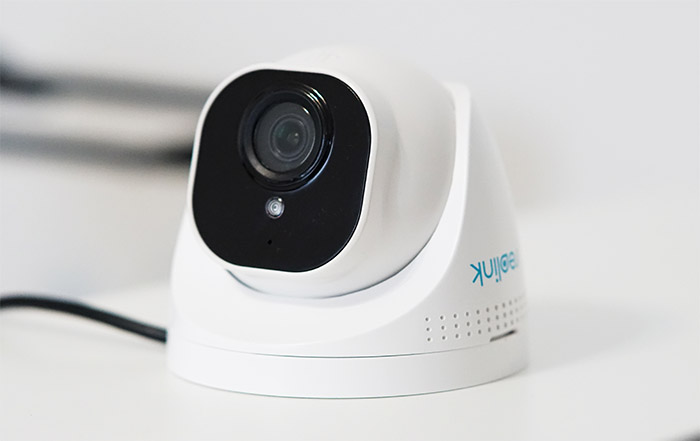
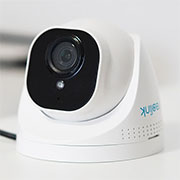
The Reolink RLC-520 is an affordable outdoor-suitable security camera built to withstand a harsh weather and, just like its predecessor, it offers a 5-megapixel resolution (2560x1920p), motion detection and night vision up to 100 feet. Indeed, the RLC-520 offers the same features as the RLC-410 (it’s pretty much identical regarding the internal hardware), but it sports a completely redesigned body, migrating from the bullet shape towards a dome-type case.
| Reolink RLC-520 | |
|---|---|
| Amazon.com | Check Product |
| Reolink.com | Check Product |
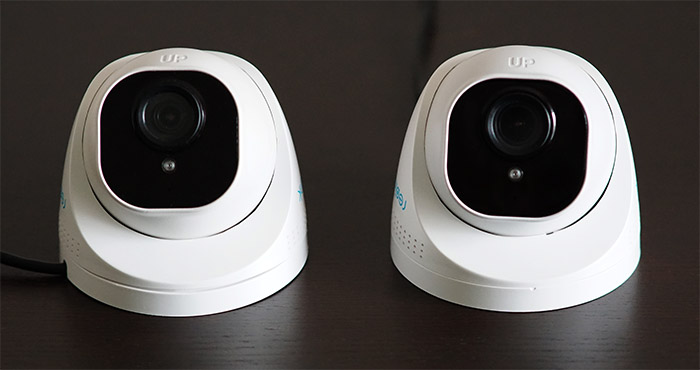
It’s debatable whether one shape is better than the other, but the RLC-520 does pride itself with a lighter case and it should also be far more unobtrusive. I know that many people confuse this model with the RLC-522 and it’s understandable since both share the same look (only the lens is different).
And truly, the only notable difference is that the RLC-522 supports 3x zoom, while the two cameras are identical in almost every other aspect (yes, including the SoC).
So, if you’re not interested into zooming into a specific spot (my tests show that the RLC-522 works best with a static area), then the Reolink RLC-520 should be more than enough for discouraging trespassers and ensuring some level of security for your house and its surroundings. There’s also that SuperHD live footage that worked great on the RLC-522 and the RLC-511, so let’s put the Reolink RLC-520 to the test and see whether you should consider it for that extra layer of security for your home.
Design and Build Quality
As I said in the introduction, the Reolink RLC-520 is the RLC-410 in a new case which is also identical to the RLC-522, so, expect the same dome-shaped case covered by a white matte finish with the base made of plastic and the body of the camera itself being made out of some alloy (zinc alloy?). The bullet-type design has the advantage of looking like the industrial-type surveillance camera so it serves a clear purpose and that’s to scare off any potential intruders. The dome-shaped devices such as the RLC-520 aren’t going to attract that much attention, but these cameras are better protected against storms or snow. Unfortunately, just like with the RLC-522, there is no support for the automatic pan and tilt movements, so you will have to adjust it by hand – the good news is that the viewing is angle is 80 degrees which is fine unless you compare it with the far wider angle of the Argus 3 that goes up to 120 degrees.
The camera comes with the mounting bracket already attached to the bottom and it’s easy to detach – simply rotate it counter-clockwise – there are also four screws inside the package to quickly mount the camera on the ceiling or wall. The cable goes through the middle opening (if you want to feed it through the ceiling) and there’s also a canal that you can use to insert the cable. The plastic base has a few openings and some holes, but the main camera body is completely sealed, so it will not be affected by bad weather. Reolink says that the RLC-520 is IP66-rated which is the same as the RLC-522 and it means that the camera will survive against powerful jets of water (useful if you live in an area with bad storms) and there’s also full protection against dust ingress. It’s also worth mentioning that the functioning temperature is between 14 and 131°F which suggests that normal winters will pose no problems to the RLC-520, but very low temperatures may cause it to turn off (such as the harsh winters of Northern Europe or Canada).
Just as I did with all previous Reolink models, I decided to open up the case and check out the internal hardware: the process is not very hard since it requires the removal of a few screws and I did take notice of the silicone seal that keeps water and dust out of the camera. After taking a look at the PCB, I could identify a Novatek NT98515MBG SoC (2003-BS T4FR8300) which is the same as on the RLC-522 and E1 Zoom and there was also a TnK 2008H17 BT16B03P network transformer and a MPMS03 MP8007 fully integrated 802.3af compatible PoE PD.
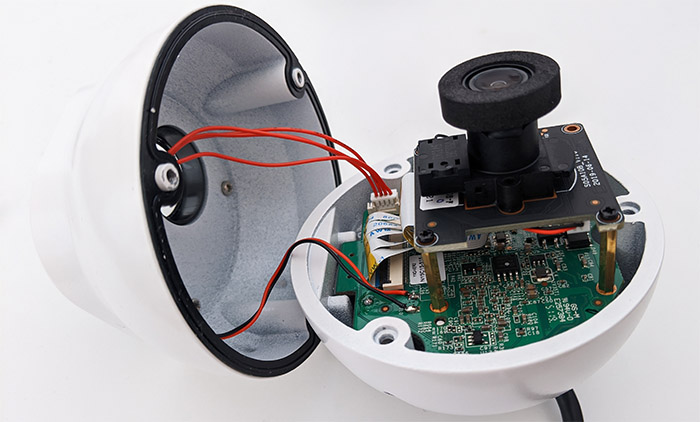
As I said before, the main body of the camera is completely sealed which means that the internal temperature can rise quite a bit and indeed, while functioning, the RLC-520 did get very warm all around the case. The front area that surrounds the lens is completely black, but it will let the 18 PCs IR LEDs to shine through when the daylight sensor (positioned immediately underneath the lens) gets triggered by low light.
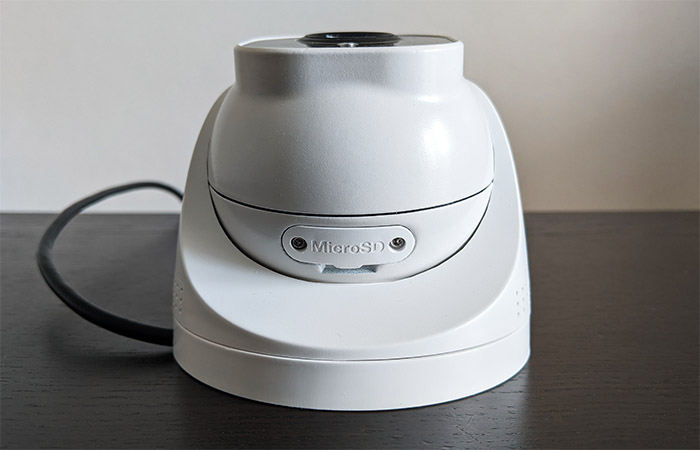
And further down, there’s also a microphone which is useful if you want to hear what’s going on outside, but not so much if you intended to carry a two-way conversation since there is no built-in speaker. Similarly to the RLC-522, you can find a microSD card slot if you move the camera body upwards and to access it, you have to remove the screws – the slot supports microSD cards up to 64GB which isn’t that much, but it’s an additional option besides the Cloud storage (the good news is that Reolink has added support for more storage with its newest camera line). The cable that’s attached to the camera body has three extremities, one for connecting to a power cable (there is no adapter inside the package), one for connecting your camera to a PoE device, be it an Ethernet switch or PoE adapter (there is an Ethernet cable inside the box) and the last extremity has a Reset button at the end which allows you to return the RLC-520 to its factory default settings (press and hold it for 10 seconds).
Hardware Installation and Setup
After you’ve chosen the perfect spot for where you want to mount the Reolink RLC-520, attach the mounting bracket and rotate the camera into place. Afterwards, you have to choose how you’re going to power on the device. As expected, probably the best way is to rely on a PoE Ethernet switch (that supports 802.3af) since you will only use a cable (ideally, shielded CAT6) for both the power and the data transfer – and no, there is no WiFi connection available. Since you’re most likely going to mount it outdoors, Reolink has added a waterproof lid kit which has a few seals to protect the connection between cables, but be aware that the cable needs to be cramped before using the lid since the mouth is not wide enough. Besides the PoE Ethernet switch option, you can also use a PoE adapter to connect the camera to your router or, if PoE is not an option, simply use a long power cable (although I’m not really a fan of this solution, especially outdoors).
Reolink RLC-520
-
Pros
- Very good video quality (multiple modes available)
- Relies on the PoE technology
- IP66-rated
- Multiple storage solutions available
- The app is very user-friendly
Cons
- No automatic pan and tilt movements
- It supports microSD cards up to 64GB
Mark is a graduate in Computer Science, having gathered valuable experience over the years working in IT as a programmer. Mark is also the main tech writer for MBReviews.com, covering not only his passion, the networking devices, but also other cool electronic gadgets that you may find useful for your every day life.