
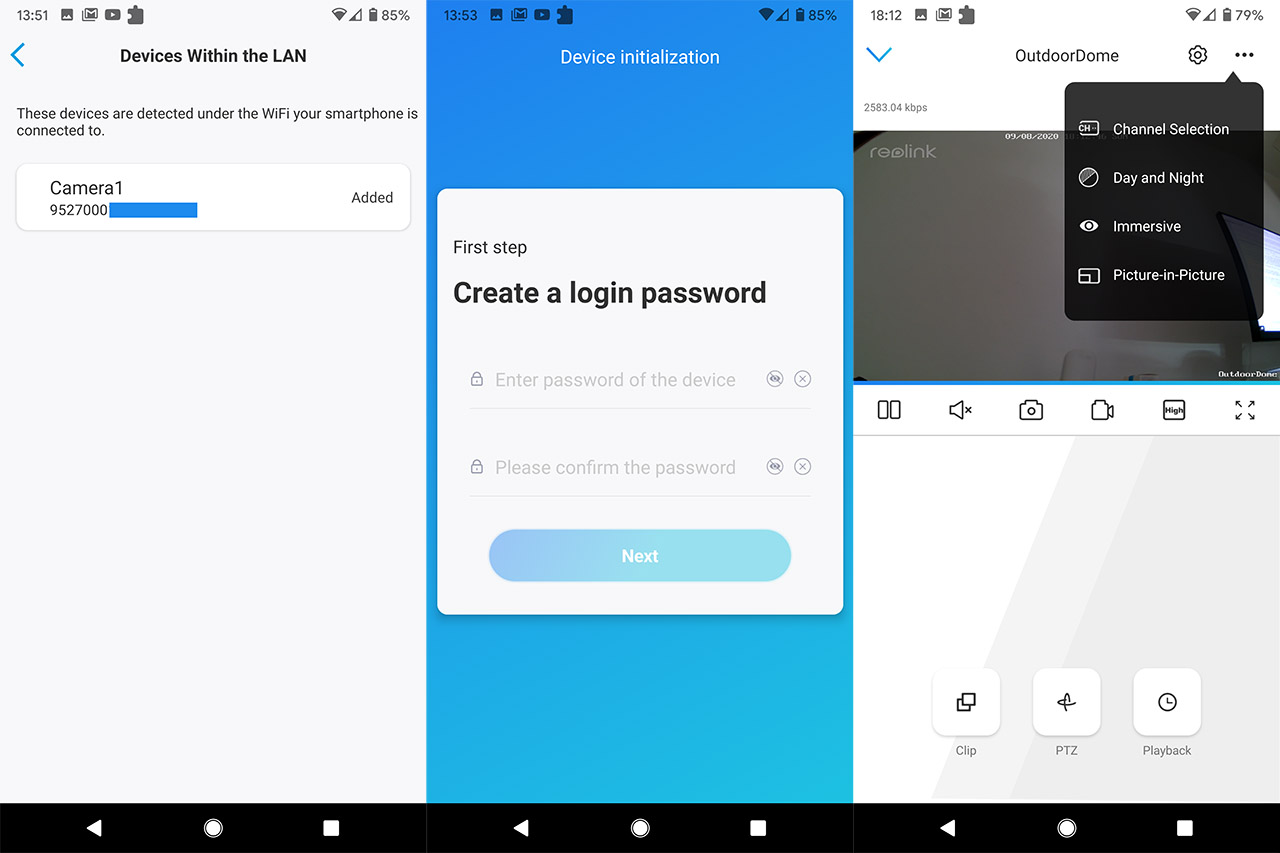
When I installed the E1 Pro and the E1 Zoom, the setup process required me to scan a QR code, but, since the RLC-522 doesn’t seem to have it printed anywhere on its case, I used the LAN option and surprisingly, the app quickly picked the camera up (the mobile device needs to be on the same network as the router). At this point, the camera will appear as Uninitialized and tapping on it will require you to Create a login password (use a strong one for security purposes – it would have been better to also be able to change the username from the default one) and select a name for the RLC-522. And that’s it, you can now explore the app user interface.
Software and Functionality
The app interface has a very similar layout to the UI on the Reolink E1 Pro and especially with the E1 Zoom, featuring the live footage on the top half of the screen and underneath it, there are some quick action icons. From the left, there’s the Play/Pause button, followed by microphone (enable it to hear the sounds captured by the camera) and the photo capture icon. To the right, you can start recording the video, change the video quality and maximize the view. The video quality can be Fluent, Balanced or 5MP (the equivalent to low, medium and high) and, when set to 5MP, you’re going to get the best possible quality, but both the bitrate and the latency will go upwards. On the top left corner of the footage, you can see the current bitrate (it will span between 1,024Kbps and 8,192Kbps) and in my case, it would usually stay at around 6,200Kbps; as for the latency, similarly to the E1 Zoom, expect a couple of seconds of delay when you use the maximum video quality.
Towards the bottom of the page, there are three larger icons, one for Clipping the footage (it zooms on a specific portion of the video), the next is for PTZ and, while on the E1 Pro and E1 Zoom, you had the possibility to pan and tilt the cameras from the app, on the RLC-522, there’s only the zoom and the focus bars available. If you do zoom in, the Focus bar moves automatically to the suitable position and, if you decide to move it manually, it may take a few seconds until you find the right spot. During the day, the image quality is excellent, with bright colors, a good contrast and a proper viewing angle (especially when set to 5MP). If you decide to step down the quality, it will change not only the resolution, but also the max bitrate. The third icon is for the Playback which will let you play any footage that’s been captured either due to a scheduled recording or motion detection. You can also speed up the video (up to 4 times) or slow it down (0.25x) and you can also download it.
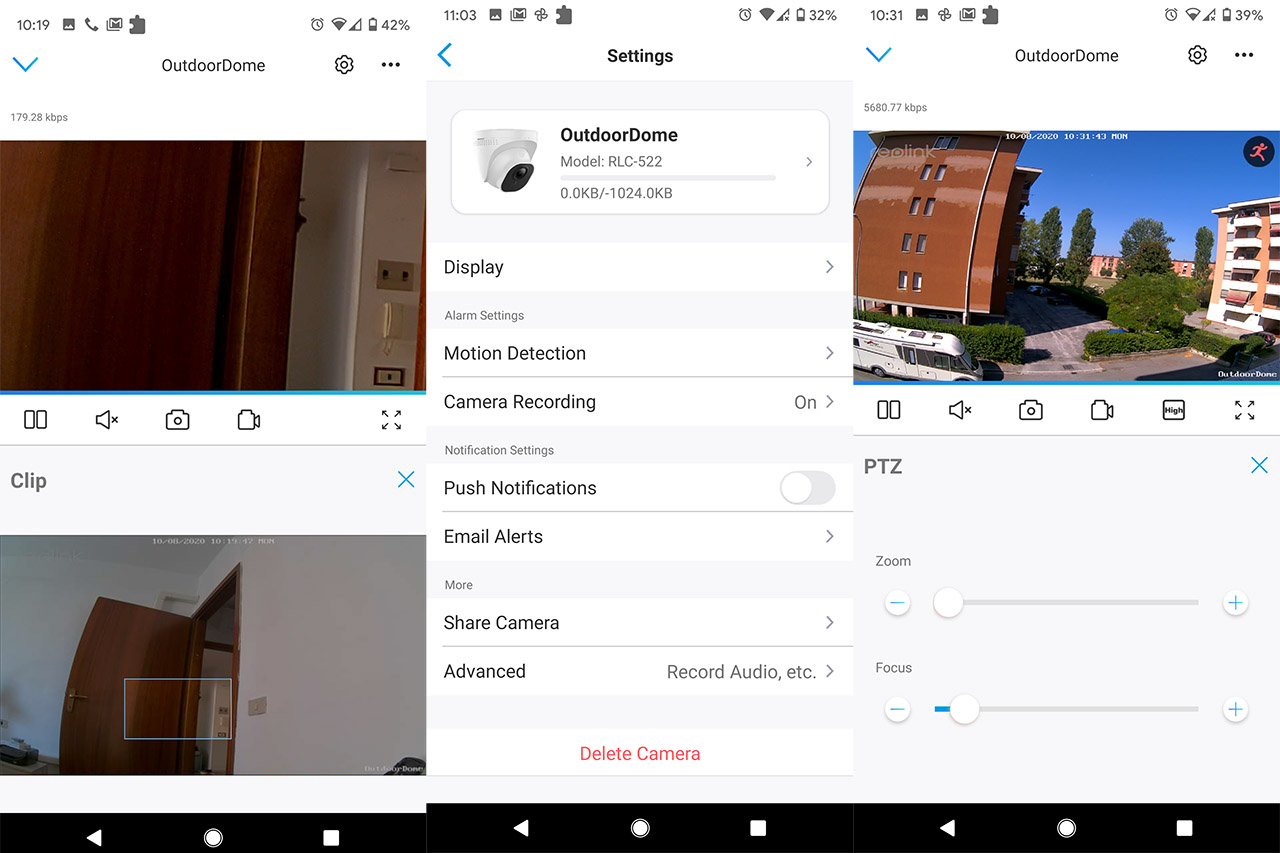
It’s worth noting that the camera will record a few seconds prior to the motion detection trigger which is very useful for detecting fast moving intruders. As for storing the video, you have two main options: on the microSD card or using the Cloud servers, but you also have the option to send the footage to a NAS. Additionally, all Reolink cameras will work with the proprietary NVR which is useful if you have more than one Reolink device available. The app will allow you to change the settings of the camera (click on the gear icon above the live footage), such as the image quality profiles, the refresh rate, the date and watermark, set the privacy mask (blur an area where you are not allowed to film) and more. The motion detection can also be adjusted from the Settings area and, by default, it’s set to 41 (just like on the E1 series) which is more than enough in most situations, considering that 50 is the maximum. Depending on the distance you want to cover, you may want to set the sensitivity to higher for a larger coverage and lower if it’s just your porch (well, unless it’s huge).
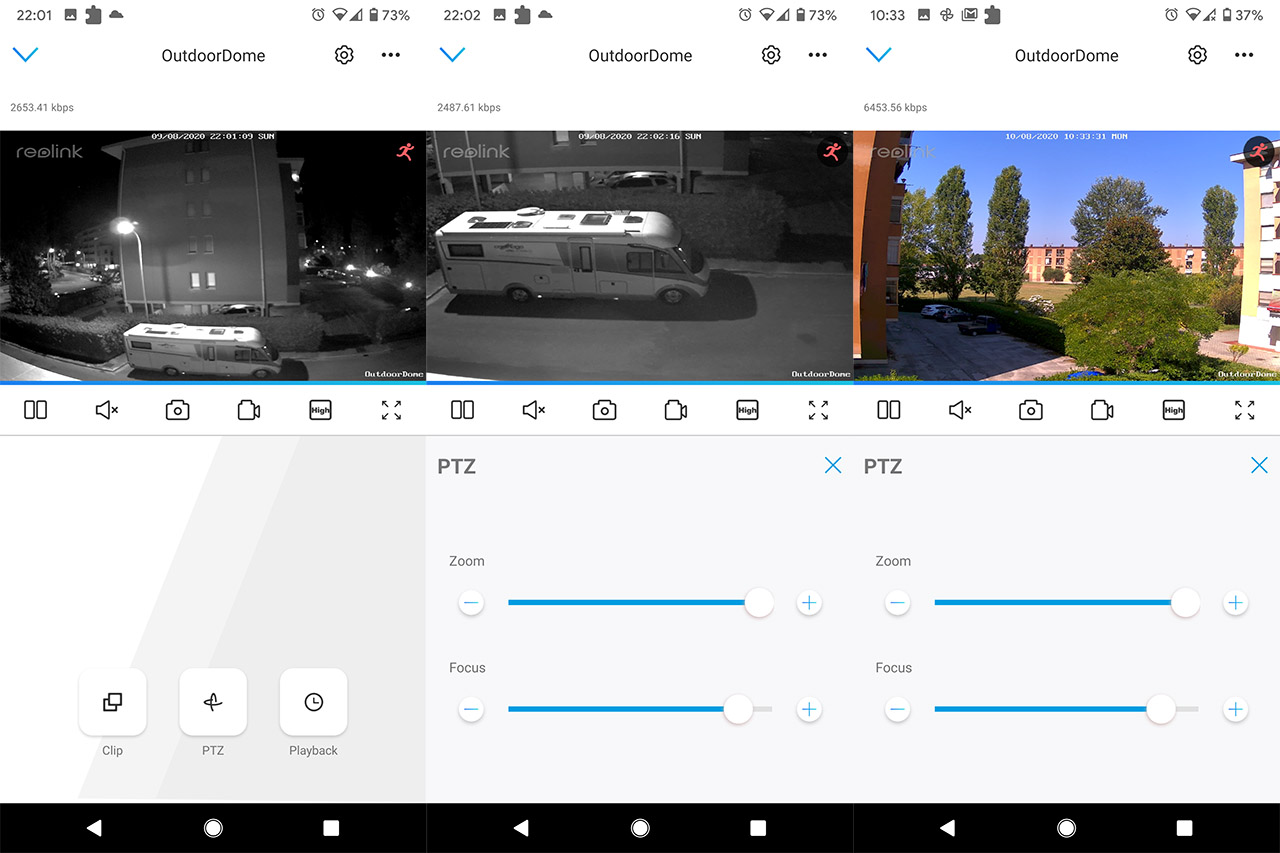
Since this is an outdoor camera, the night vision is extremely important and thanks to the 18 LEDs, the Reolink RLC-522 does a good job at showing lots of details near the camera (on a distance of no more than 10 feet), but I also pointed the camera towards some buildings and cars in the distance (about 200 feet away) and, as you can see from the (unfortunately compressed) images, it does a good job outlining the scenery. Zooming in during the night will take a few seconds more than during the day to focus and again, the quality remains mostly unchanged. I know that a lot of you may ask if the delay in focusing doesn’t make the zooming feature irrelevant when you need to quickly see something closer. It’s true that outdoors, where everything is more dynamic than indoors, by the time the camera focuses, the event could have already happened and you may have missed it, but if you need to monitor a static object more closely, such as a far away gate or fence, then the RLC-522 is going to work just great.
Conclusion
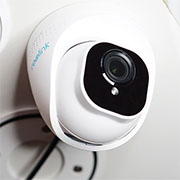
The dome-type cameras are valued for their unobtrusive nature and the Reolink RLC-522 will indeed subtlety ensure the safety of your home and its surroundings by offering high quality live footage (with multiple ways to store the videos). The zoom ability is a welcomed addition and, while it may not be the fastest to focus, the camera still can make use of this feature to monitor a far-away area. That being said, considering that the device covers pretty much every feature that one may expect from an outdoor camera (plus some more) and since the price is right, it makes the RLC-522 one of the best options out there.
Reolink RLC-522
-
Pros
- Excellent video quality
- 3x zoom
- Good motion detection
- Is dust and waterproof (IP66)
- Makes use of the PoE technology
Cons
- Supports cards only up to 64GB
- The case gets a bit hot
- No automatic pan or tilt
Mark is a graduate in Computer Science, having gathered valuable experience over the years working in IT as a programmer. Mark is also the main tech writer for MBReviews.com, covering not only his passion, the networking devices, but also other cool electronic gadgets that you may find useful for your every day life.