
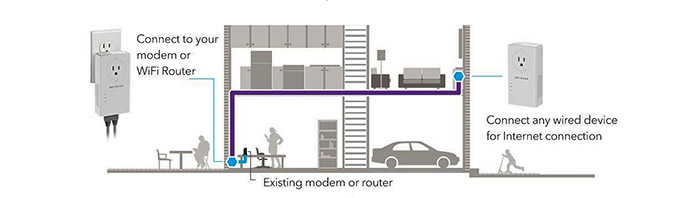
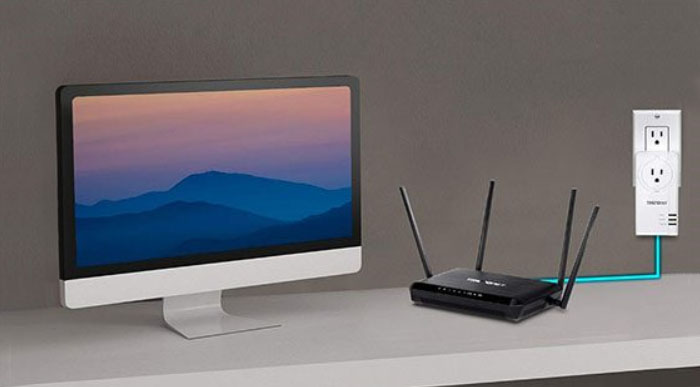
The best powerline adapter should manage to offer a reliable alternative to the traditional Ethernet wiring, allowing the user to extend the network using the home electrical lines without worrying about the weaknesses of the WiFi signal (distance, number of walls and other type of interference). Since the networking market is overcrowded in almost every department, in order to find out which are the best powerline adapters, I checked out some of the most popular HomePlug and G.hn units and have compiled this comprehensive list.
Before that, it’s very important to understand that a powerline adapter is not needed in every home since it isn’t that hard to have a good WiFi connection nowadays thanks to the powerful routers available (and some of them come at reasonably affordable prices), but sometimes, it’s not enough having a single router, especially if you have a large home, with thick walls and lots of interference. In this scenario it’s inevitable that you will have wireless dead-zones, so there are a few options that you can explore.
UPDATE: The Comtrend G.hn Powerline PG-9182PoE has been added to the best powerline adapters list
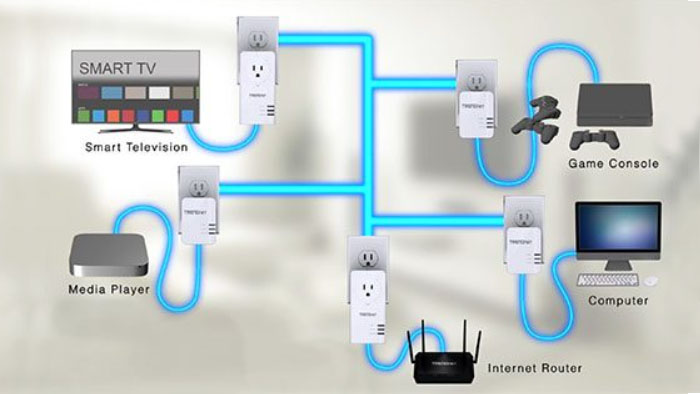
Note: We have discussed in detail what are the powerline adapters and how do they work, but to summarize, you simply use the electricity cables inside your home to carry the internet signal and have a close-to-ethernet-cables performance.
We have also discussed the possibility of using old or unused routers as access points, wireless repeaters or in bridge mode, but be aware that some options require Ethernet cables throughout your house, while others will halve the signal, leaving you with a basic, non-satisfactory Internet connection.
1. Extollo LANPlug 2000 Powerline Adapter
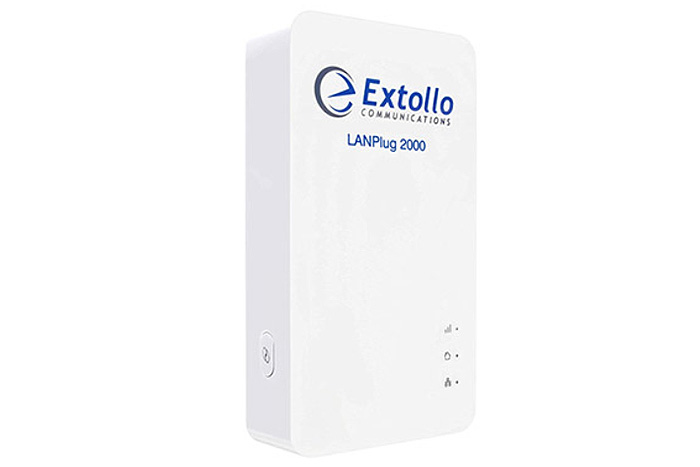
About three years ago, Extollo proudly released its LANSocket 1500, a HomePlug AV2 powerline adapter which would compete within an increasingly crowded market with the other manufacturer, but, last year, Extollo seems to have had a change of heart and left the HomePlug standard behind in favour of the less popular G.hn technology and created the Extollo LAN Plug 2000, which became the fastest powerline adapter available on the market right now.
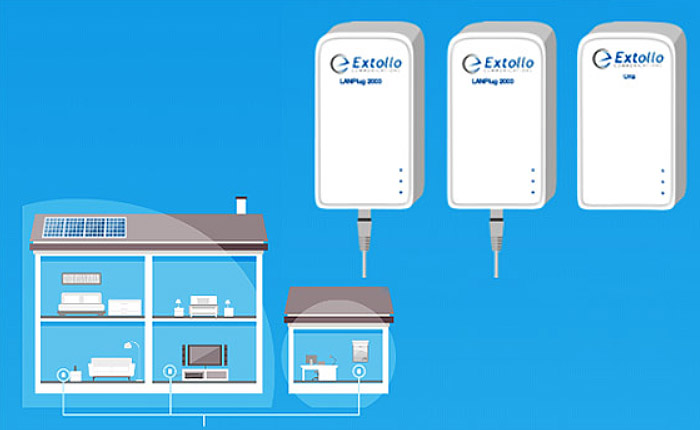
The LANPlug 2000 kit includes two identical Power line adapters, two Ethernet cables and a Quick Start Guide. Furthermore, similarly to other powerline adapters, you can simultaneously connect up to 16 LANPlug 2000 adapters on a single Gh.n domain.
Note: Since it’s based on a different technology, it’s not compatible with the LANSocket 1500.
Design
The last Gh.n adapter that I saw was the Comtrend PG-9182 and, in terms of design, it didn’t differ that much from its HomePlug siblings which means that this is the preferred form-factor for this type of devices. Following the same design guidelines, the Extollo LAN Plug 2000 features a rectangular case with rounded corners and it’s entirely covered by a white matte finish (it does not retain fingerprints).
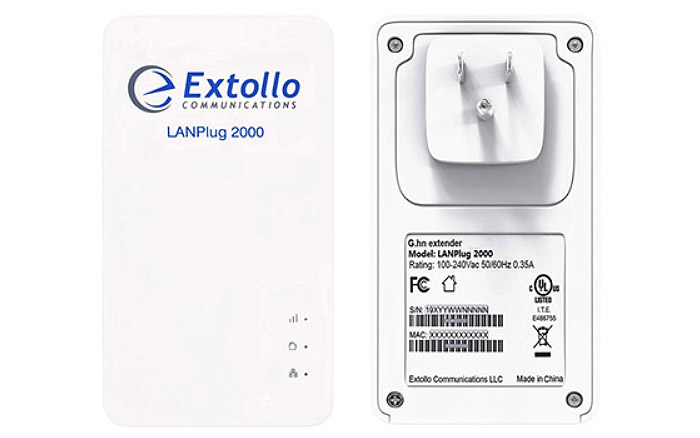
On the rear side, the powerline adapter has two areas of interest, one with the three-prong plug and the other with the label containing the necessary info (including the mode, the serial number and the MAC address).
Unlike the LANSocket 1500, the Extollo LANPlug 2000 doesn’t have a pass-through outlet, so it shouldn’t have the luxury of being too big since it would cover additional outlets but, considering its size (it measures 4.73 x 2.56 x 1.15 inches), unfortunately, the device could definitely obstruct the top socket – you have to sacrifice at least a couple of wall outlets in your home if you want to use this kit.
The front of the powerline adapter is home to three small LED lights (next to their respective icons) that show the status of Powerline Performance, the Powerline and the Ethernet. The Powerline Performance LED shows you the signal strength, so you could easily select the best place to connect the adapter, in order to get the fastest link rates. If the LED is green, you get the best speed performance (more than 200 Mbps), otherwise, if it’s amber, the link rates are between 100 and 200 Mbps and if it’s red, the speed performance is less than 100 Mbps.
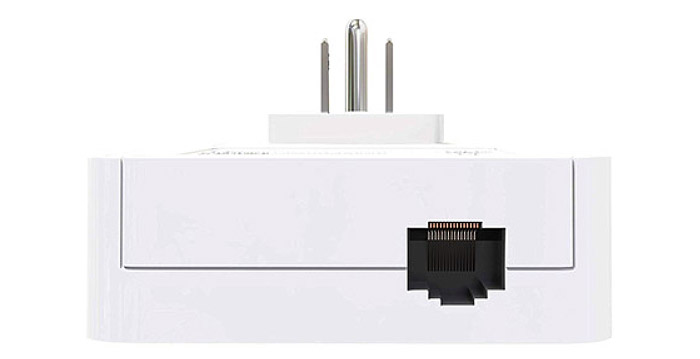
The Powerline LED will be solid amber when the adapter has not been paired yet, while solid green indicates that the device has been paired with another powerline adapter. On the bottom of the Extollo LAN Plug 2000, you can find a single Gigabit Ethernet RJ45 port and, on the lateral side, there’s a Pairing button (press it for 3 to 5 seconds to start the pairing process or press and hold it for about 20 seconds until both the Powerline and the Ethernet LEDs turn on in order to return the adapter to factory default settings). If you have more than one Ethernet-ready device close to each other, you will have to use a multi-port switch, because, so far, there is no variant with more than one port on the adapter.
Setup and Performance
The hardware installation is, as usual, simple. First of all, you have to connect one adapter to a switch or router using the provided Ethernet cable and then into a wall socket. Next, connect a second unit to an Ethernet-ready device using the other provided cable and connect the adapter to a close-by wall socket.
Afterwards you have to pair and secure the adapters. To do that you will have to press the Pairing button for 3 to 5 seconds on the first unit and then, you will have two minutes to press the Pairing button on the second unit. And the setup is done.
It’s true that other HomePlug powerline adapters have already implemented the MU-MIMO technology, but it’s still nice to see that Extollo decided to add it to its LANPlug 2000 (in the 2×2 form), this feature allowing simultaneous transmission of data on two of the three electrical wires (phase, neutral and ground).
Furthermore, the powerline adapter uses the BeamForming tech to create two independent signal paths to improve the transmission of data (on a per-packet basis) to and from the client (Extollo claims gains between 2 to 5 dB).
Having two units 10 feet apart, on the same circuit, with less to no interferences, the Extollo LANPlug 2000 went up to 285 Mbps (on a 300 Mbps plan). At around 30-35 feet (on the same circuit, but with some interference), the adapter surprisingly remained at around 260 Mbps, which makes it the best performing powerline adapter, better than what some HomePlug devices from the competition have to offer.
Note: Extollo also provides an integrated GUI for managing the powerline adapter and, to access it, you need to identify the IP address that it received from the router, insert the address into a web browser and, when asked, write ECLP2000 as the password; once you gained access to the interface, you can change the Domain Name, select the node Type (Domain Master or End Point), change the Profile and the pairing Password, configure the IP settings, update the Firmware and more.
2. NETGEAR PLP2000 AV2000 Powerline Adapter
![]()
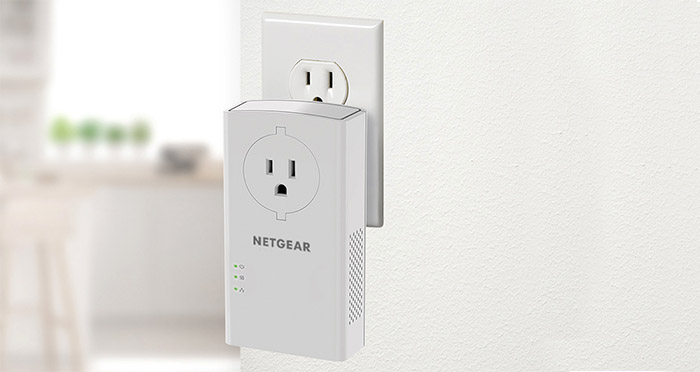
Following in the footsteps of the popular PL1200, Netgear has released a new powerline adapter at the end of the last year, called the PLP2000 which, besides featuring everything that made the PL1200 a better product than its competitors (such as the extra noise-filtered pass-through power outlet and the multiple data streams (MIMO) for an improved coverage), it now comes with a better speed performance, thus making it one of the most desirable powerline adapters on the market.
The kit includes two long, 6.5-foot Ethernet cables, a Quick Start Guide and two identical powerline adapters (each with extra outlets). Similarly to almost all other powerline adapters in this list (except for the TP-Link adapters), the Netgear PLP2000 allows the user to connect up to 16 adapters on a single network (8 active nodes).
Design
The Netgear PLP2000 sports the same ergonomic rectangular shape as the other powerline adapters, with soft rounded corners and a white matte finish covering the entire surface (does not retain fingerprints). A single unit measures 5.25 x 2.83 x 1.49 inches (and weighs 0.53 lbs), so it is slightly larger than the PL1200 and it most likely will cover an adjacent power outlet, but thankfully, it does have a built-in pass-through outlet to make up for it (so you can still connect an additional device to that wall socket, if you need to).
Note: Using the pass-through outlet may eliminate some electrical noise (because it uses a narrower frequency range).
Similarly to a lot of adapters, the Netgear PLP2000 uses a three-prong plug and is HomePlug AV2 MIMO compliant (including the compatibility with the IEEE 1901 and the IEEE 802.3 standards).
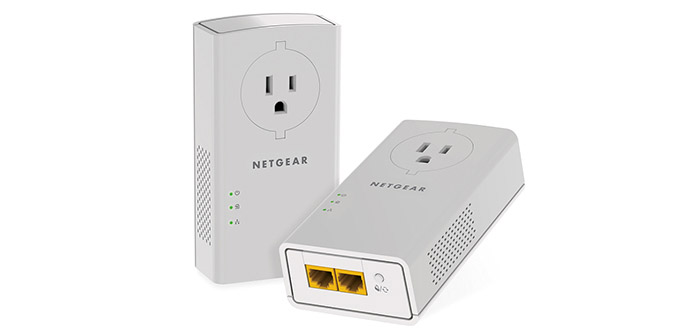
To ensure that the device has a proper heat management and that it won’t overheat, Netgear has added two sets of vent holes on the lateral sides (one on each side) – something that we also saw with the PL1200, but often neglected by other manufacturers. Furthermore, the front of the adapter is home to three LED lights (just underneath the built-in socket) which are responsible for showing the status of the Power, the Pick A Plug and Ethernet. The Power LED will flash once every second when the adapter is in the process of setting up the security and will blink slowly (about once every 3 seconds), when the device is in power saving mode.
The Pick a Plug LED will show you the best spot to connect the adapter by displaying a solid green colour, when the signal is strong and the connection is in good conditions (the link rate will be above 80 Mbps), it will display amber if the connection is fair (a link rate between 50 and 80 Mbps) and the LED will be red if the signal is poor, where it’s recommended to choose another outlet (the link rate will be below 50 Mbps). If the Powerline LED is turned off, it means that the unit could not find compatible powerline adapters that use the same encryption key.
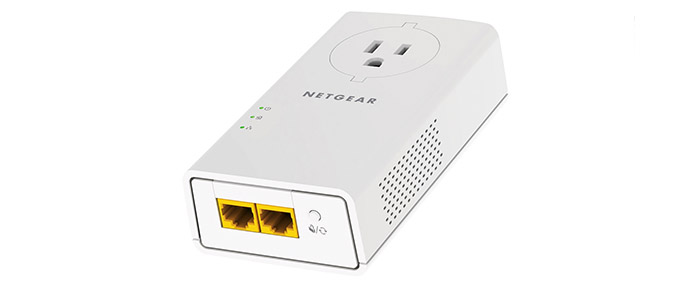
On the bottom of the adapter you will find two Gigabit Ethernet ports and on the right side of the unit, there is the Security / Factory Reset button (press and hold the button for 1 to 3 seconds to automatically create a secure powerline network and press and hold the button for 8 to 10 seconds to return the device to factory default settings). Since Netgear decided to add only two ports, if you had more than one Ethernet-ready devices, you have to either use one adapter per device or purchase a multi-port Ethernet switch.
Setup and Performance
In order to setup the Netgear PLP2000, you have to connect one powerline unit to a router or gateway using the provided Ethernet cable (use a LAN port) and plug the unit into a wall socket (wait until the Pick A Plug LEDs is lit). Afterwards, repeat the same steps for the second unit and make sure to keep it close to your appliances (so you can easily connect to the desired device – TV, Desktop computer, console or even another access point).
Next, in order to secure the network (using a 128-bit AES encryption), press and hold the Security / Factory Reset button for two seconds and then, you have 2 minutes to press the Security / Factory Reset button on the second unit. Now, wait until the powerline network recognizes each powerline device (it can take up to 80 seconds or as little as 5 seconds) and, when the Power LEDs stops blinking, the installation process is complete.
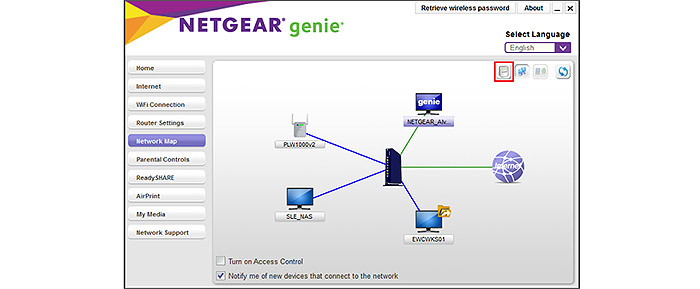
If you install the Netgear genie app on your computer, by navigating to the Network Map and selecting the powerline adapter, you can see the speed performance, perform a reset to factory default settings, view some device stats and more.
In order to test the adapter, we tried to emulate an ideal scenario, keeping the adapters close to each other, at around 10 feet, using the same circuit and maintaining the interferences to a minimum. This delivered a maximum speed of 348 Mbps (with an average of 340 Mbps).
To emulate a more realistic scenario, we added some interferences, put about 30 feet between the adapters and we measured no more than 214 Mbps. As you know, every home is unique and depending on the wiring setup, it is possible to get better or worse speed rates.
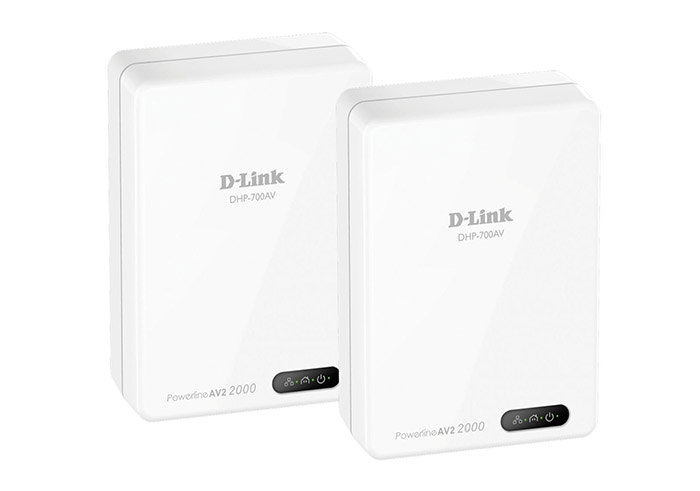
3. D-Link Powerline AV2 2000 (DHP-701AV)
![]()
The D-Link Powerline DHCP-701AV supports the latest AV2 2000 standard and was released at the end of 2014.
The kit includes two identical powerline adapters, a Quick Install Guide and two Ethernet cables. Similarly to Netgear PL1200, you can connect a maximum of 16 adapters using a single powerline network.
Design
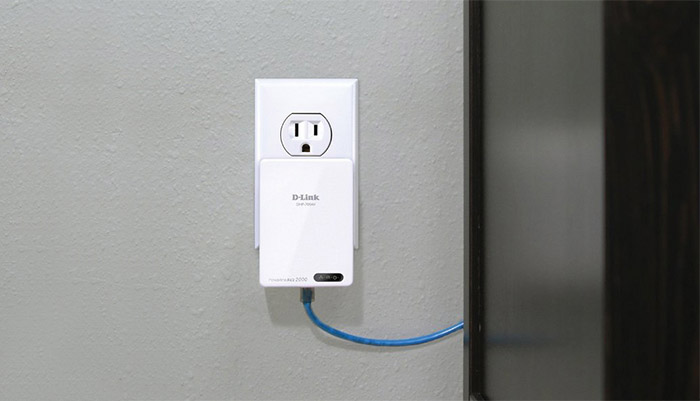
The D-Link DHCP-701AV features a small and compact case, with a white, glossy finish and a small black bar around the LED lights. A single unit measures 3.89×2.86×1.34 inches and weighs 0.3 lbs. Overall, it’s smaller and lighter than the Netgear PL1200 and, most likely, won’t block any adjacent power outlet.
Still, in case it does cover an extra outlet, unfortunately, there is no pass-through option for the DHCP-701AV adapter, the room in which is installed will have one less power socket.
The D-Link adapter is HomePlug Av2 compliant and uses a three-pong plug.
The front of the adapter is where you’ll find the LED lights for Power, Ethernet and Powerline. The Powerline LED light uses the same system as the Pick and Plug from the Netgear to help you choose the best outlet for the best connection. So, if the LED light is green, then the link rate is the best, if the LED light is amber, then the link rate is better and lastly, if the LED is red, then the link rate is good.
The bottom of the D-Link DHCP-701AV is home to the recessed Reset button (hold it for 10 seconds to reset the adapter to factory settings), a Simple Connect button (for security, it uses a 128-Bit AES encryption) and one Gigabit Ethernet Port.
Note: Since the adapter has only one Ethernet port and there is no version with multiple ports available, you will not be able to connect more than one Ethernet-ready devices (there are multi-port Ethernet Switches available on the market).
Setup and Performance
Setting up the D-Link Powerline DHCP-701AV doesn’t require more steps than the usual powerline adapter. You just have to connect the first adapter to a router or switch using one of the provided Ethernet cables (use the LAN ports) and then plug it into a nearby wall socket.
Next, connect the second adapter, also using an Ethernet cable to an Ethernet-ready device (PC, console, TV or a printer) and plug it into a electrical outlet. Now, you have to wait for the Power and Ethernet LED lights to turn green and afterwards, use the Simple Connect button to secure your network (press it for two seconds on one unit and then you have two minutes to press the same button on the other unit).
Note: You can also use the Quick Install Guide if you get in trouble.
The D-Link DHCP-701AV is advertised to be able to reach 2000 Mbps, which obviously won’t happen, first of all because it represents the receive and transmit rates counted together and second of all because it really depends on the wiring conditions. So, we won’t expect outrageous link rates.
Still, the adapter did pretty good and let’s not forget that it uses the Broadcom HomePlug AV2 MIMO chip, which should give it an edge over the competition.
In close to ideal conditions, keeping the adapters at about 10 feet apart and with less to no interferences, we measured up to 320 Mbps. Using not-so-ideal-conditions (a different room at around 30 feet, some interferences), it didn’t go below 180 Mbps. But keep in mind that the state of your electric wiring is a decisive factor and using a different circuit will deliver lower speeds.
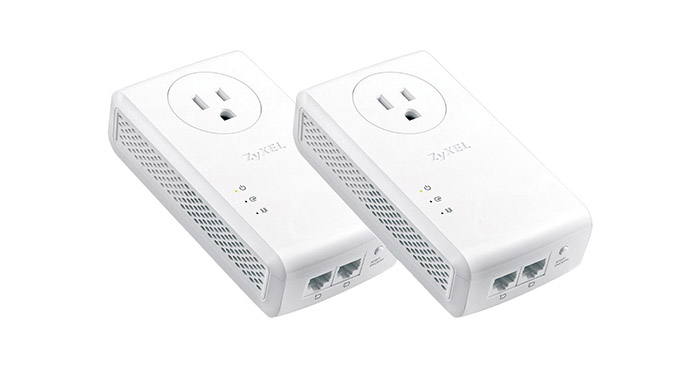
4. ZyXEL PLA5456KIT AV2000 HomePlug AV2
![]()
The ZyXEL adapters are a bit peculiar, but not in the hardware sense, more about the manufacturer. Both this model and the previous (the PLA5405) are not certified by the HomePlug Alliance, even though both carry the AV label.
Obviously, this wasn’t a problem with the previous model and it won’t be with this one because there is interoperability with other HomePlug adapters (although ZyXEL makes no promises). Another thing you should know is that while the ZyXEL PLA5405 was based on QualComm chips, the newer PLA5456 is based on Broadcom chips, so they may not play well together.
Keeping this in mind, know that the kit includes two identical adapters, 56-inch Ethernet cables and a Quick Install Guide. You can add up to 16 devices on the same powerline network.
Design
ZyXEL PLA5456KIT features the same white and glossy compact case we are accustomed with (it’s a very popular design since it’s very operational and convenient to use). A single unit measures 5.25×2.79×1.51 inches and weighs 0.5 lb, so it’s bulkier and heavier than the usual powerline adapter, but there is a reason for it, the PLA5405 has a built-in pass-through outlet.
This means that even if the unit obstructs an additional outlet, you still get to use that power socket for any other device, making it extremely convenient. But that’s not all, on the bottom of the adapter, next to the Encrypt/Reset button (providing a 128-bit AES encryption), there are two Ethernet ports. Having more than one Ethernet-ready devices nearby to connect to the adapter won’t be a problem any more.
Note: The ZyXEL adapter uses a three-pong plug (also known as a cheater plug).
On the front of the ZyXEL PLA5456, underneath the pass-through outlet, there are three LED lights for Power, Ethernet and Powerline. The Powerline LED shows you which is the best outlet to plug in your adapter so you get the best performance. If the LED is green, then you get the best link rates, otherwise, if it’s amber, it means you’re getting better link rates and if it’s red, you receive good link rates.
Setup and Performance
Setting up the ZyXEL PLA5456 is really easy and generic (the same steps for most adapters). First of all, you have to connect a unit to a router or a switch using an Ethernet cable (use the LAN ports) and then just plug it into the wall.
The same steps should be followed for the second unit, but this time connect it to one or two Ethernet-ready devices. Be careful that the included Ethernet cables are quite short (these cables aren’t really expensive). Next, in order to secure the network you should press and hold the Reset/Encrypt button for 2 seconds and press the same button on the second unit within 2 minutes.
The advertised speed of the ZyXEL PLA5456 is 1800 Mbps (full-duplex, combined received and transmit rates) and during our tests, it reached 802.11n comparable throughput (although lower than the advertised rates, obviously). Also, let’s not forget that the adapter uses a Broadcom based chip and the excellent MIMO technology.
So, in close to ideal conditions (on the same circuit, 10 feet apart and with less interferences), the PLA5456 delivered speeds up to 360 Mbps. In real-life conditions (at around 30 feet, different rooms and some interferences), the speed averaged at about 195 Mbps.
The ZyXEL PLA5456 performed really great and is a good addition to a home without CAT5/6 wiring.
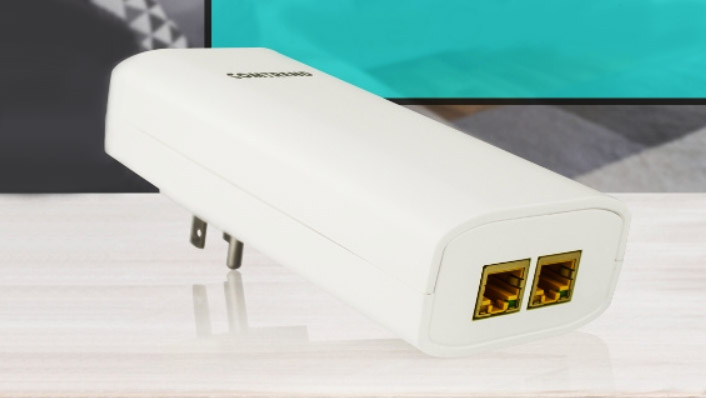
5. Comtrend G.hn Powerline PG-9182PoE
![]()
Most powerline adapters are based on the HomePLug Powerline Communication standard, but Comtrend took a different route from the beginning, its PG-9172 adapter being based on the G.hn standard which, unlike the HomePlug that can only use the electrical wiring in your home, it can rely on coaxial and telephone wires as well, supporting data rates of up to 2Gbps.
Unfortunately, despite its clear advantages, the G.hn powerline adapters have a far lower market share than the HomePlug competitors, mostly due to being represented by a single manufacturer. While I did see this technology on the Arris SBR-AC1900P router, the Comtrend PG-9182 series (the successor to the PG9172) is the newest to represent the G.hn powerline technology (and it’s still one of the few to take advantage of it).
Due to some interesting additional features, I am going to focus on the PC-9182PoE model which supports the PoE tech (up to 30Watts). Similarly to the HomePlug adapters, you can add a maximum of 16 adapters on a single G.hn network.
Design
Design-wise, there aren’t major differences between the Comtrend G.hn PG-9182PoE and the other powerline adapters, since you do get the same rectangular plastic case covered by a white finish, but since it supports the PoE technology, the device is a bit taller than the regular powerline (it measures 5.75 x 2.74 x 1.53 inches which is similar to the adapters that have a pass-through socket). The decision to use the PoE technology was a wise one since it will allow the users to easily add PoE wireless access points inside their house without relying on long Ethernet cables (and indeed, there are a lot more PoE APs available in 2021, but bear in mind the throughput limitation you get from using this type of adapters).
The Comtrend PG-9182PoE uses a three-prong plug and because of its size, depending on the design of your power sockets, it may block an additional outlet. If you can’t lose a socket and don’t care for the PoE tech, then the series does provide a model with a pass-through outlet called the PG-9182PT, so you won’t have to sacrifice an outlet in the room where the adapter will be installed.
On the front of the adapter you will find three LED indicators for Power, Connection and Security. The Connection LED can help you place the adapter in the best spot for the faster speeds. If the Connection LED is Green, you get a line rate greater than 40 Mbps and if the LED is orange, then the throughput is between 5 and 40 Mbps; in case the LED is red, the speeds will be below 5 Mbps and you may need to find another socket for a better performance. The Security LED will turn solid green when the adapter is secure (it will blink when the network keys are being generated).
On the lateral side (closest to the LEDs), there’s the Security button (press it to initiate the synchronization process in Secure Mode) and a small recessed Reset button (you have to press the button for ten seconds using a paper clip to return the device to the default factory settings).
On the bottom of the powerline adapter, there are two Gigabit Ethernet ports, both supporting the 802.3at PoE standard (30W).

Setup and Performance
Before setting up the Comtrend PG-9182PoE, be aware that you will need at least two powerline adapters (the secondary unit doesn’t have to be PoE). That being said, the installation process is no different than with any other powerline adapter: you have to connect the first unit to a router or a switch via an Ethernet cable (use any of the two LAN ports) and then plug in the adapter to a wall socket (don’t plug it into a power strip because if you do, the network performance will be significantly impacted). Repeat the same process and connect the second adapter to an Ethernet-ready device.
Wait until the Power and the Security LEDs become green and, to secure the network, you need to press the Security button on the first Comtrend powerline adapter (the Security LED will start flashing green) and then you will have two minutes to click on the same button on the secondary adapter.
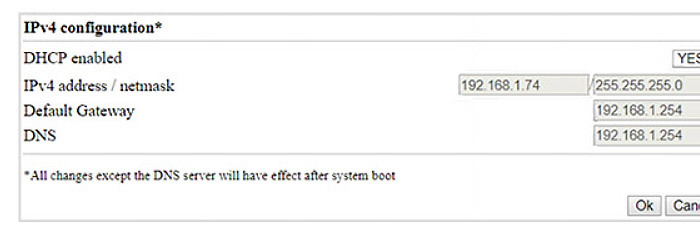
The Comtrend PG-9182PoE does have a web based graphical user interface and to access it, open any browser (on a device that’s connected to the powerline adapter) and insert the default IP address (which is 192.168.0.5). When prompted, enter admin for the Authentication password and betera for the Factory Reset (if you want to return the adapter to factory settings).
The Web Configuration page allows you to configure the IP (IPV4, IPV6 and mixed), the Ethernet (Power saving), Device (software and hardware information, as well as Security setup and firmware update), Multicast configuration, QoS configuration, VLAN, G.hn spectrum, Log file and Advanced (Broadcast suppression, Hardware Reset and Factory Reset).
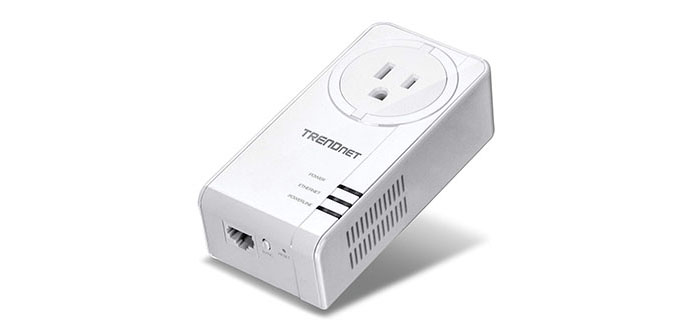
6. TRENDnet TPL-423E 1300 AV2 Powerline Adapter
![]()
The TRENDnet TPL-423E is the newest powerline adapter from the Californian-based company and the latest attempt to improve its existing line of powerline products, while further perfecting the way the user can receive a decent Internet connection via the existing electricity cables. Besides taking advantage of the Powerline 1300 technology, the highlighted features of the TPL-423E are the BeamForming and the MIMO (Multiple Input Multiple Output) technologies.
The kit (TPL-423E2K – with two identical adapters) includes a Quick Installation Guide, a CD-ROM (Utility and User Guide), two 5-feet Ethernet cables and two identical powerline adapters. It is recommended to connect a maximum of 8 adapters to a single network.
Design
The TRENDnet TPL-423E is identical to its predecessor, the TPL-421E2K (an AV2 1200 powerline adapter), so it sports the same small rectangular case with soft rounded corners and it is covered by a white matte finish to repel fingerprints (not that you’re going to touch the device a lot).
Furthermore, on the front side, the TPL-423E is also equipped with a three-prong plug (the device is compliant with the HomePlug AV2 standard) and, overall, the adapter remains quite compact and it keep both the weight and the dimensions of its predecessor: it measures 4.73 x 2.4 x 2.6 inches and weighing 6.2 oz. Despite being rather small and lightweight, it still may obstruct an additional socket, so the additional pass-through outlet is a suitable addition.
Immediately underneath the pass-through outlet (and under the TRENDnet logo), you can find three LED indicators positioned horizontally, responsible for Power (blinking indicates that the sync is in progress), Ethernet (blinking indicates that data is being received / transmitted) and Powerline.
The Powerline LED will display a certain colour, depending on the link rate strength to help you choose the best spot where to install the adapter. So, if the LED displays a solid green colour, you get the best performance, otherwise, if it’s solid amber, the link rate is good and if it’s red, the powerline is simply connected so, to get a decent link rate, you should find a better spot (if the indicator is flashing, then data is being transmitted / received over powerline).
The bottom of the adapter is home to a Sync button, one Gigabit Network port and a recessed Reset button (to return to factory settings insert a paper clip and hold it for 1 second – it will reset to the default private network name ‘HomePlug AV’). I noticed that on the sides, the TPL-423E features some ventilation holes in hopes that it will help with maintaining a good internal temperature (the device still remains a bit warm while functioning, but that’s something that stands true for almost all powerline adapters).
Setup and Performance
Setting up the TRENDnet TPL-423E2K is easy and straight-forward. First, pick one unit and connect it to a router (or switch) using the provided Ethernet cable and afterwards, plug it into a wall socket. Next, repeat the same steps and connect a second adapter to the device of your choice.
Finally, you may want to secure your network. To do this, press and hold the Sync button for 2 seconds. Afterwards, you will have 2 minutes to press the Sync button on the second adapter. And that’s it.
The TRENDnet TPL-423E2K can also be configured using the Powerline Utility app that you can install on your PC using the provided CD. After you install the utility, by following the steps provided by the Wizard, you get access to the app interface.
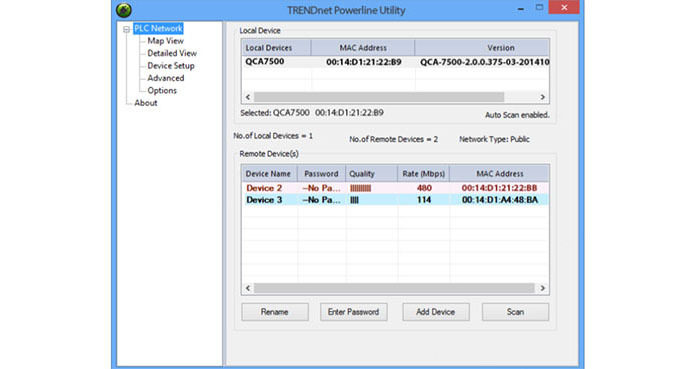
Here, you can have a look at the PLC Network, with its specific sections: Map View (view the connected devices, add passwords and add new devices), Detailed View (info about the PC, adapters and the utility version), Device Setup (set Local Device, Private Network Name, Multicast Address and more), Advanced (Upgrade Firmware, QoS settings and Reset Device) and Options (Auto Scan interval) and finally, the About section.
Testing the TPL-423E in close-to-ideal conditions (I put 10 feet between adapters, kept the interference to the minimum and used the same circuit) will deliver no more than 190 Mbps. In less-than-ideal conditions (more than 30 feet distance between adapters, some interference) will deliver an average of 70 Mbps.
7. TP-Link TL-PA9020P AV2000 Powerline KIT
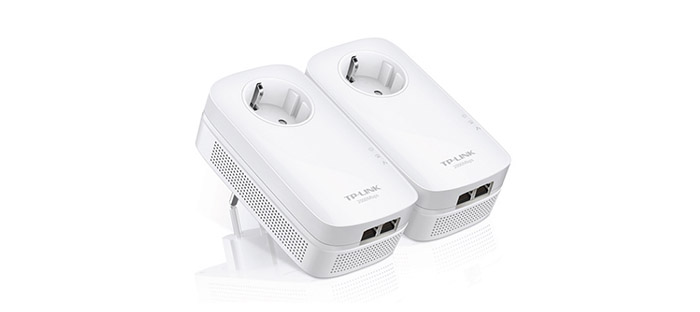
![]()
TP-Link TL-PA9020P is the latest powerline adapter from TP-Link and the first from this manufacturer to claim the AV2000 speed performance (surely, this are theoretical maximum speeds and the real throughput will be no more than a quarter).
The kit includes two AV2000 TL-PA9020P adapters, two 6.5-feet long RJ-45 Ethernet cables and a Quick Installation Guide. While the TP-Link TL-PA8030P AV1200 allowed up to 254 nodes on a single powerline network, I was surprised to see that the newer TL-PA9020P took a backwards step and only allowed a maximum of 8 nodes in one powerline network.
Design
There are no major differences between the TL-PA9020P and its AV1200 predecessor. You get the same non-intrusive rectangular box with soft rounded corners, covered by a white glossy finish and with small patches of vent holes all around the edges of the adapter. The device remains a bit large (measuring 5.2 x 2.8 x 1.7 inches), but if it covers your double-wall socket, it has a built-in pass-through outlet that allows you to connect additional devices (useful if the room doesn’t have lots of power sockets).

Also, be aware that the pass-through outlet has a two-prong plug instead of three prongs, because the adapter covers the third hole.
Besides the pass-through socket, on the front of the TL-PA9020P there is a vertical array of three LED lights, responsible for Power (if it blinks once every second, it means that the device is in the process of pairing; if it blinks once every 3 seconds, then the Power Saving mode is on), Powerline (red means that the network is in poor conditions, so you could try another socket; yellow-green means that the network is stable and in good conditions) and Ethernet.
On the right side of the powerline adapter, there is a small Pair button (press and hold it for a second to join a secure powerline network or to set up the device; hold the button for about 8 seconds to leave an existing powerline network; hold the button for more than 15 seconds to reset the adapter) and on the bottom of the TL-PA9020P, there are two 10/100/1000 Mbps Ethernet ports. If two ports are not enough, you can always add Ethernet Switches and further expand your LAN network.
Note: You can check out our round-up of the best Ethernet Switches.
Setup and Performance
Setting up the TL-PA9020P involves plugging in the adapter into a wall-socket (directly into a wall and not using a multiple sockets device) and add an Ethernet cable to connect the adapter to your PC’s LAN port.

Afterwards, it is very important to secure your powerline network. The HomePlug AV standard uses the 128-bit AES encryption which allows a safe communication between your devices. The Pair button allows you to create a secured powerline connection between HomePlug AV devices, all you have to do is press the Pair button of the first adapter (the Power LED will flash) and within 2 minutes, press the pair button on the second powerline adapter (the Power LED of the second adapter will start flashing).
Now, wait for a minute for the two powerline adapters to connect and when the Power LEDs will stop flashing and display a solid light, the pairing has been made. Furthermore, TP-Link provides a small management utility that gives you an overview over the status of your powerline network and allows you to upgrade the firmware (there are also some basic QoS settings).
Testing these adapters in ideal conditions (same circuit, no interferences, no more than 10 feet between them), we measured a maximum throughput of 296 Mbps. After some additional devices were added to the circuit and some more space was put between the adapters (around 30 feet), we measured a maximum of 122 Mbps.
8. Tenda PH10 AV1000 Gigabit PowerLine Adapter
![]()
Just like almost every other manufacturer of networking devices, Tenda offers a large variety of options to easily and reliably cover your home with WiFi, ranging from the regular router and access point to the newer WiFi mesh system and, if these solutions won’t work for your house, you can use the Tenda powerline adapters. The manufacturer has entered this market about three years ago, but it has recently released a new series of devices, from which I’m going to focus on the Tenda AV1000 PH10. You may have noticed that the PH3, the PH5 and the PH6 are also AV1000, so what does the PH10 bring new to the table?
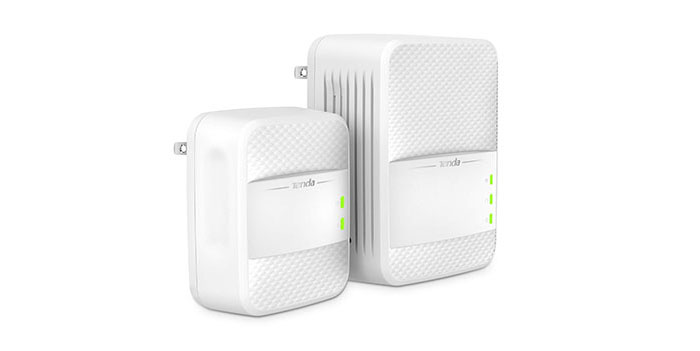
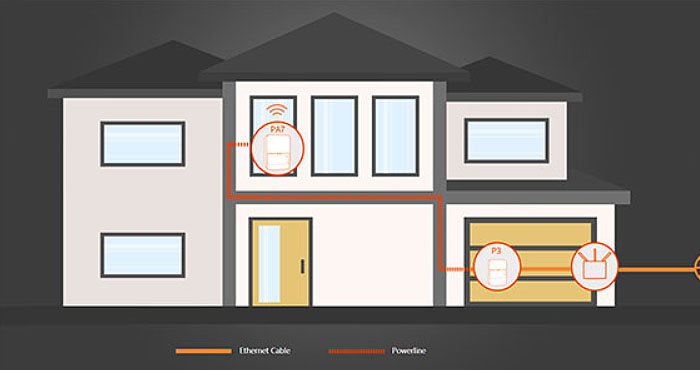
Well, from the performance point of view, they don’t differ that much, but while the PH3 focuses towards being as unobtrusive as possible, the Tenda PH6 is larger, but it comes with a pass-through socket. The PH10 lacks a pass-through socket, but it does come with WiFi capabilities – the kit includes two AV1000 Tenda Powerline AV2 1000 Gigabit devices (the larger one is the extender – also called PA7, while the smaller is the adapter – called the P3), two Cat5e Ethernet Cables and one Quick Installation Guide.
Design
The Tenda PH10 extender (PA7) is a relatively small and compact device, measuring 4.3 x 3.0 x 1.9 inches, so, in most cases, it shouldn’t cover any additional power sockets (even so, the powerline adapter will still seize one socket, so you need to carefully plan beforehand where to position the device). At the same time, the Tenda P3 (the PH10 adapter) is even smaller, measuring 3.1 x 2.4 x 1.3 inches (this device will surely not cover any adjacent power socket).
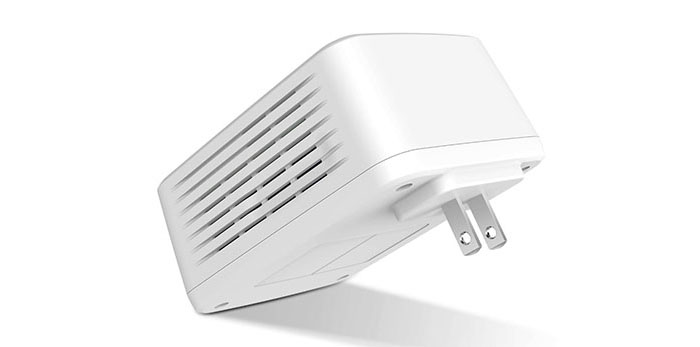
It doesn’t seem that Tenda cared that much about design continuity, so the PH10, PH6 and PH3 don’t really share that many design traits. Surely, the PH3 and the PA7 + P3 have a rectangular case (and all are covered by a white finish), but the front side of both PH10 devices is covered by an oval pattern interrupted in the middle (on the P3) or towards the bottom (on PA7) by a slightly protruded area where rest the LEDs and the Tenda logo. On the other side, both PH10 powerline adapters come with a HomePlug AV2 compliant two-prong plug and the larger PA7 extender has some cut-outs on the lateral sides to keep the internal temperature at a decent level (the powerline adapters are usually more prone to overheating).
The PA7 extender has three LED indicators: the first LED shows the status of the WiFi connection (if it’s solid green, then the WiFi is enabled and if the LED is flashing green, then the WiFi cloning process has been initiated), the second LED shows the status of the Powerline connection (the LED will blink green when the device is pairing with other powerline adapters and it will be solid green after the process is concluded; the LED will be solid red when the network connection is poor, so it is advisable to connect the PA7 to another power socket) and lastly, there’s the Power LED (solid green means that everything is working properly and the device is connected to a power source, while flashing green indicates that the powerline adapter is in Power Saving Mode). The P3 adapter has two LED indicators, one shows the status of the Powerline connection and the other if the device is Powered On or Off (or if it’s in the Power Saving mode).
On the bottom of the P3 powerline extender, you’ll find a single Gigabit RJ45 LAN port (use it to connect to the router) and, next to it, rests a Pair/Reset button which, when pressed, it will initiate the pairing process; if pressed and held for more than 6 seconds, it will return the device to factory default settings. The PA7 extender also has one Gigabit Ethernet port (can be used to connect additional wired clients) and a Pair/Reset button, along with a WiFi button (when it is on, press and hold it for 3 seconds to initiate the WiFi cloning process or for 6 seconds to disable the WiFi; if it is turned Off, press the button for for 3 seconds to turn the device On).

Setup and Performance
To properly set up the Tenda PH10 AV1000 you have to follow pretty much the same routine as with the other powerline adapters: first, connect the P3 unit (the adapter) to a switch or router using the Ethernet cable provided and then plug it into a wall socket. Afterwards, connect the PA7 unit (the extender) to an Ethernet-ready device and plug it into a nearby outlet (it’s advisable to avoid connecting the adapter to a power strip).
The Tenda powerline adapters will pair automatically after they detect each other on the same circuit, but you can use the Pair button if you want to either create a secure network or if you want more than one powerline network on the same circuit. The process is quite simple and all you have to do is to press the Pair/Reset button until the Power LED will start blinking. This means that the adapter created a new, randomly generated encryption key. To finish the setup you will have one minute to press the Pair/Reset button on the second unit. After the WiFi LED turns solid (on the PA7 unit), you will be able to connect wireless devices to the powerline network (there is a label containing the SSID and the password) – you can also clone the router’s SSID & password and, to so do, press the WiFi button on the PA7 unit and the WPS button on the router until the WiFi LED turns solid on the powerline extender: this is the sign that the WiFi network name and passkey have been cloned.

Tenda advertises the PH10 as being capable of delivering a throughput of up to 1 Gbps, but, in reality, this is just a theoretical maximum allowed by the chip (also consider the full-duplex aspect). In close to ideal conditions (adapters are 10 feet apart, less to no interference and the same circuit) you will get a maximum of 250 Mbps. Emulating not-so-ideal conditions (30 feet apart, some interference), the adapter scored up to an average of 95 Mbps. Since the kit has a wireless extender, I connected a client to the 2.4GHz network and when the adapters were about 10 feet apart, I measured around 101 Mbps, while at 30 feet, I got an average of 44 Mbps. After I switched to the 5GHz network (802.11ac), I measured an average of 180 Mbps when the powerline adapters were 10 feet apart and an average of 61 Mbps when the adapters were 30 feet apart.
Mark is a graduate in Computer Science, having gathered valuable experience over the years working in IT as a programmer. Mark is also the main tech writer for MBReviews.com, covering not only his passion, the networking devices, but also other cool electronic gadgets that you may find useful for your every day life.
These updates are very helpful. Have you done tests across phases within a house (left side vs right side circuits on a panel.) MIMO is supposed to help resolve this issue which previously significantly reduced performance of these powerline extenders. Test with one device plugged into plug on circuit on right side of panel and other on left side of panel.
I have previous 2017 powerline device and had to get electrician to move circuit for our garage to same side as circuit by my main router. It would be great to know which devices are not impacted by circuit panel phase A and B.
Thanks.
TC